Thursday, September 17, 2020

Triangle Treat Pouches


I love these triangle treat pouches!  Not only are they easy to make, they only use a small amount of DSP (Designer Series Paper) so you can make a whole bunch without using a ton of supplies. I found them to be a little addicting to make as well.  I wanted to try all kinds of different DSP to go with the upcoming holidays.  I learned how to make these from Sam Hammond.  I hope you will love making them too!

You can watch me make these pouches on my Facebook Live HERE.

How to make:
  • Cut a 3" x 6" piece of DSP, score at 3"
  • At the top and bottom of the 3" side, place a little mark at 1-1/2"(I used a pencil). Score in a diagonal line from the 1-1/2" mark to the 3" score line on the edge of the paper.  (Difficult to explain, easy to understand in the video).
  • Fold on all your score lines and have the flaps from one side overlap the other flaps.  Put a hole punch in each side of the pouch through both flap layers.
  • Thread your ribbon through the holes, but before tying it closed, put some candies inside.
  • Decorate the front.  I used the stitched scallop circle label piece from the Little Treat Pouch Box dies.
These are the different kinds of candy I put inside:

Thank you for stopping by.  You will see a supply list at the end of this post.  Please use the following host code for online orders this month: JRTJSFJB.  If your order is over $50, you will receive a free package of envelopes from me.  Email me with your choice of color, either white or vanilla.

Happy Stamping!
Marsha

Product List

Tuesday, September 15, 2020

Box Cards


These box cards are a unique way to give a card!  They can fold flat to put in an envelope, then be bent a little so they can stand up.  I saw this idea for box cards from Emma at Creative Time For Me.

You can watch me demonstrate how to make the pet card on Facebook HERE.


Here are the measurements:

  • Card base: 5-1/2" x 8-1/4", score at 1/4", 3/4", 4-1/4", 4-3/4"

  • Insert for the inside piece: 5-3/8" x 3-3/8"

Directions:

  • After cutting your card base, decide how you want to cut your windows.  I used Stitched Rectangle dies for the greeting opening on both the pet cards and the Holiday cards.  I used the  Heart Punch Pack for the bottom window on the pet cards and the largest circle from the Layering Circle dies for the Christmas cards.  For the navy blue ornament card, I attached a sheet of Brightly Gleaming DSP (3-1/4" x 5-1/4") to the card BEFORE I die cut the shapes.

  • If you want to stamp your card base, do that next.  

  • Lay your insert piece underneath the window openings and stamp the greeting through the window (I forgot to do this on the video, and you will see the challenges it caused!).  If your other images fit through the window, you can stamp them through the opening as well, if not, mark the edges of your opening with a pencil, then stamp on the insert separately.

  • Put adhesive on the 1/4" strip, attach it to the other end and shape it into a box (watch the video if you are unsure how to do this).

  • You will need to slide your insert into the box and attach it where you want it.  I used glue on some cards and Stampin' Dimensionals on others (shown in the video).

  • Decorate the front any way you want.

  • To get the red scalloped heart, punch the non-scalloped heart out of red cardstock, then use the scalloped heart punch over the window you already punched and punch again.  Glue this piece to the card front. (Shown in video).

  •  Christmas Tree card--I sponged Balmy Blue ink around the bottom part of the insert, and added liquid applique and glitter (heated with a heat gun) to get the puffy snow.


Thank you for stopping by.  You will see a supply list at the end of this post.  Please use the following host code for online orders this month: JRTJSFJB.  If your order is over $50, you will receive a free package of envelopes from me.  Email me with your choice of color, either white or vanilla.

Happy Stamping!
Marsha

Product List
Real Red Stampin' Write Marker
[100052]
$3.50

Wednesday, September 2, 2020

August 2020 Paper Pumpkin Kit--World's Greatest


I love the colors in the August Paper Pumpkin kit! It was fun to have a shaker card included.  In addition to the projects that came with the kit, I made a couple of 3D alternatives that I thought I would share the measurements for here.  You can see me make all the projects above on my Facebook Live video, I'll put minute markers for the alternative projects below.

Watch Facebook video of me making these projects HERE.


The miniature pizza box was a really easy alternative.  I plan to put a frosted sugar cookie inside of a few of these to give to my son's teachers from church.  We haven't had church for many months because of the Covid-19 pandemic, but my 9-year-old's teachers have dropped off gifts, bookmarks, and other things to let him know they are thinking of him.  I want to return the favor and say thank you! 

Directions for mini-pizza box:
Out of the green argyle card base, cut a piece that is 3-1/4" square.  Attach it to the the front of the box.  Cut a 3-1/4" piece of ribbon and trim the ends into a banner.  Use the die-cuts and stamps from the kit to make the circle piece the same as the one on the card and attach to the pizza box with dimensionals.  Watch the video at the 16:56 minute mark to see me make this project.
 
Directions for 2-4-6-8 Box:
This is one of the first 3D projects I learned to make at a Stampin' Up Convention 15+ years ago.  It's easy to remember the measurements because it's 2-4-6-8.  You start with a 5-1/2 x 8-1/2 piece of cardstock (I used the green argyle card base and ignored the score mark that was already there).  With the 8-1/2" side at the top, score at 2", 4", 6", and 8".  Turn the card so the 5-1/2" side is at the top and score at 2."  Watch the video at the 35:40 minute mark to see how to put the box together.


The three cards above are the card designs included with the kit.  If you don't make alternatives, you can make three of each card with your kit supplies.  

This next card is an alternative I saw from Debbie Henderson on the Paper Pumpkin Fan Club page. I liked it so much, I had to case her work.  This card uses the negative piece from the supplies that go with the shaker card.  You can see me make it at the 22:47 mark.


Thanks for stopping by!  Let me know if you try any of these projects.  Click HERE to become one of my Paper Pumpkin Subscribers. I will send you Tombow Adhesive and a piercing mat as a gift when you subscribe with me.  Placing an online order this month?  Please use the following hostess code: ZBV6AFJM.  Get a free package of envelopes from me on orders of $50 or more!

Happy Stamping!
Marsha


Wednesday, August 12, 2020

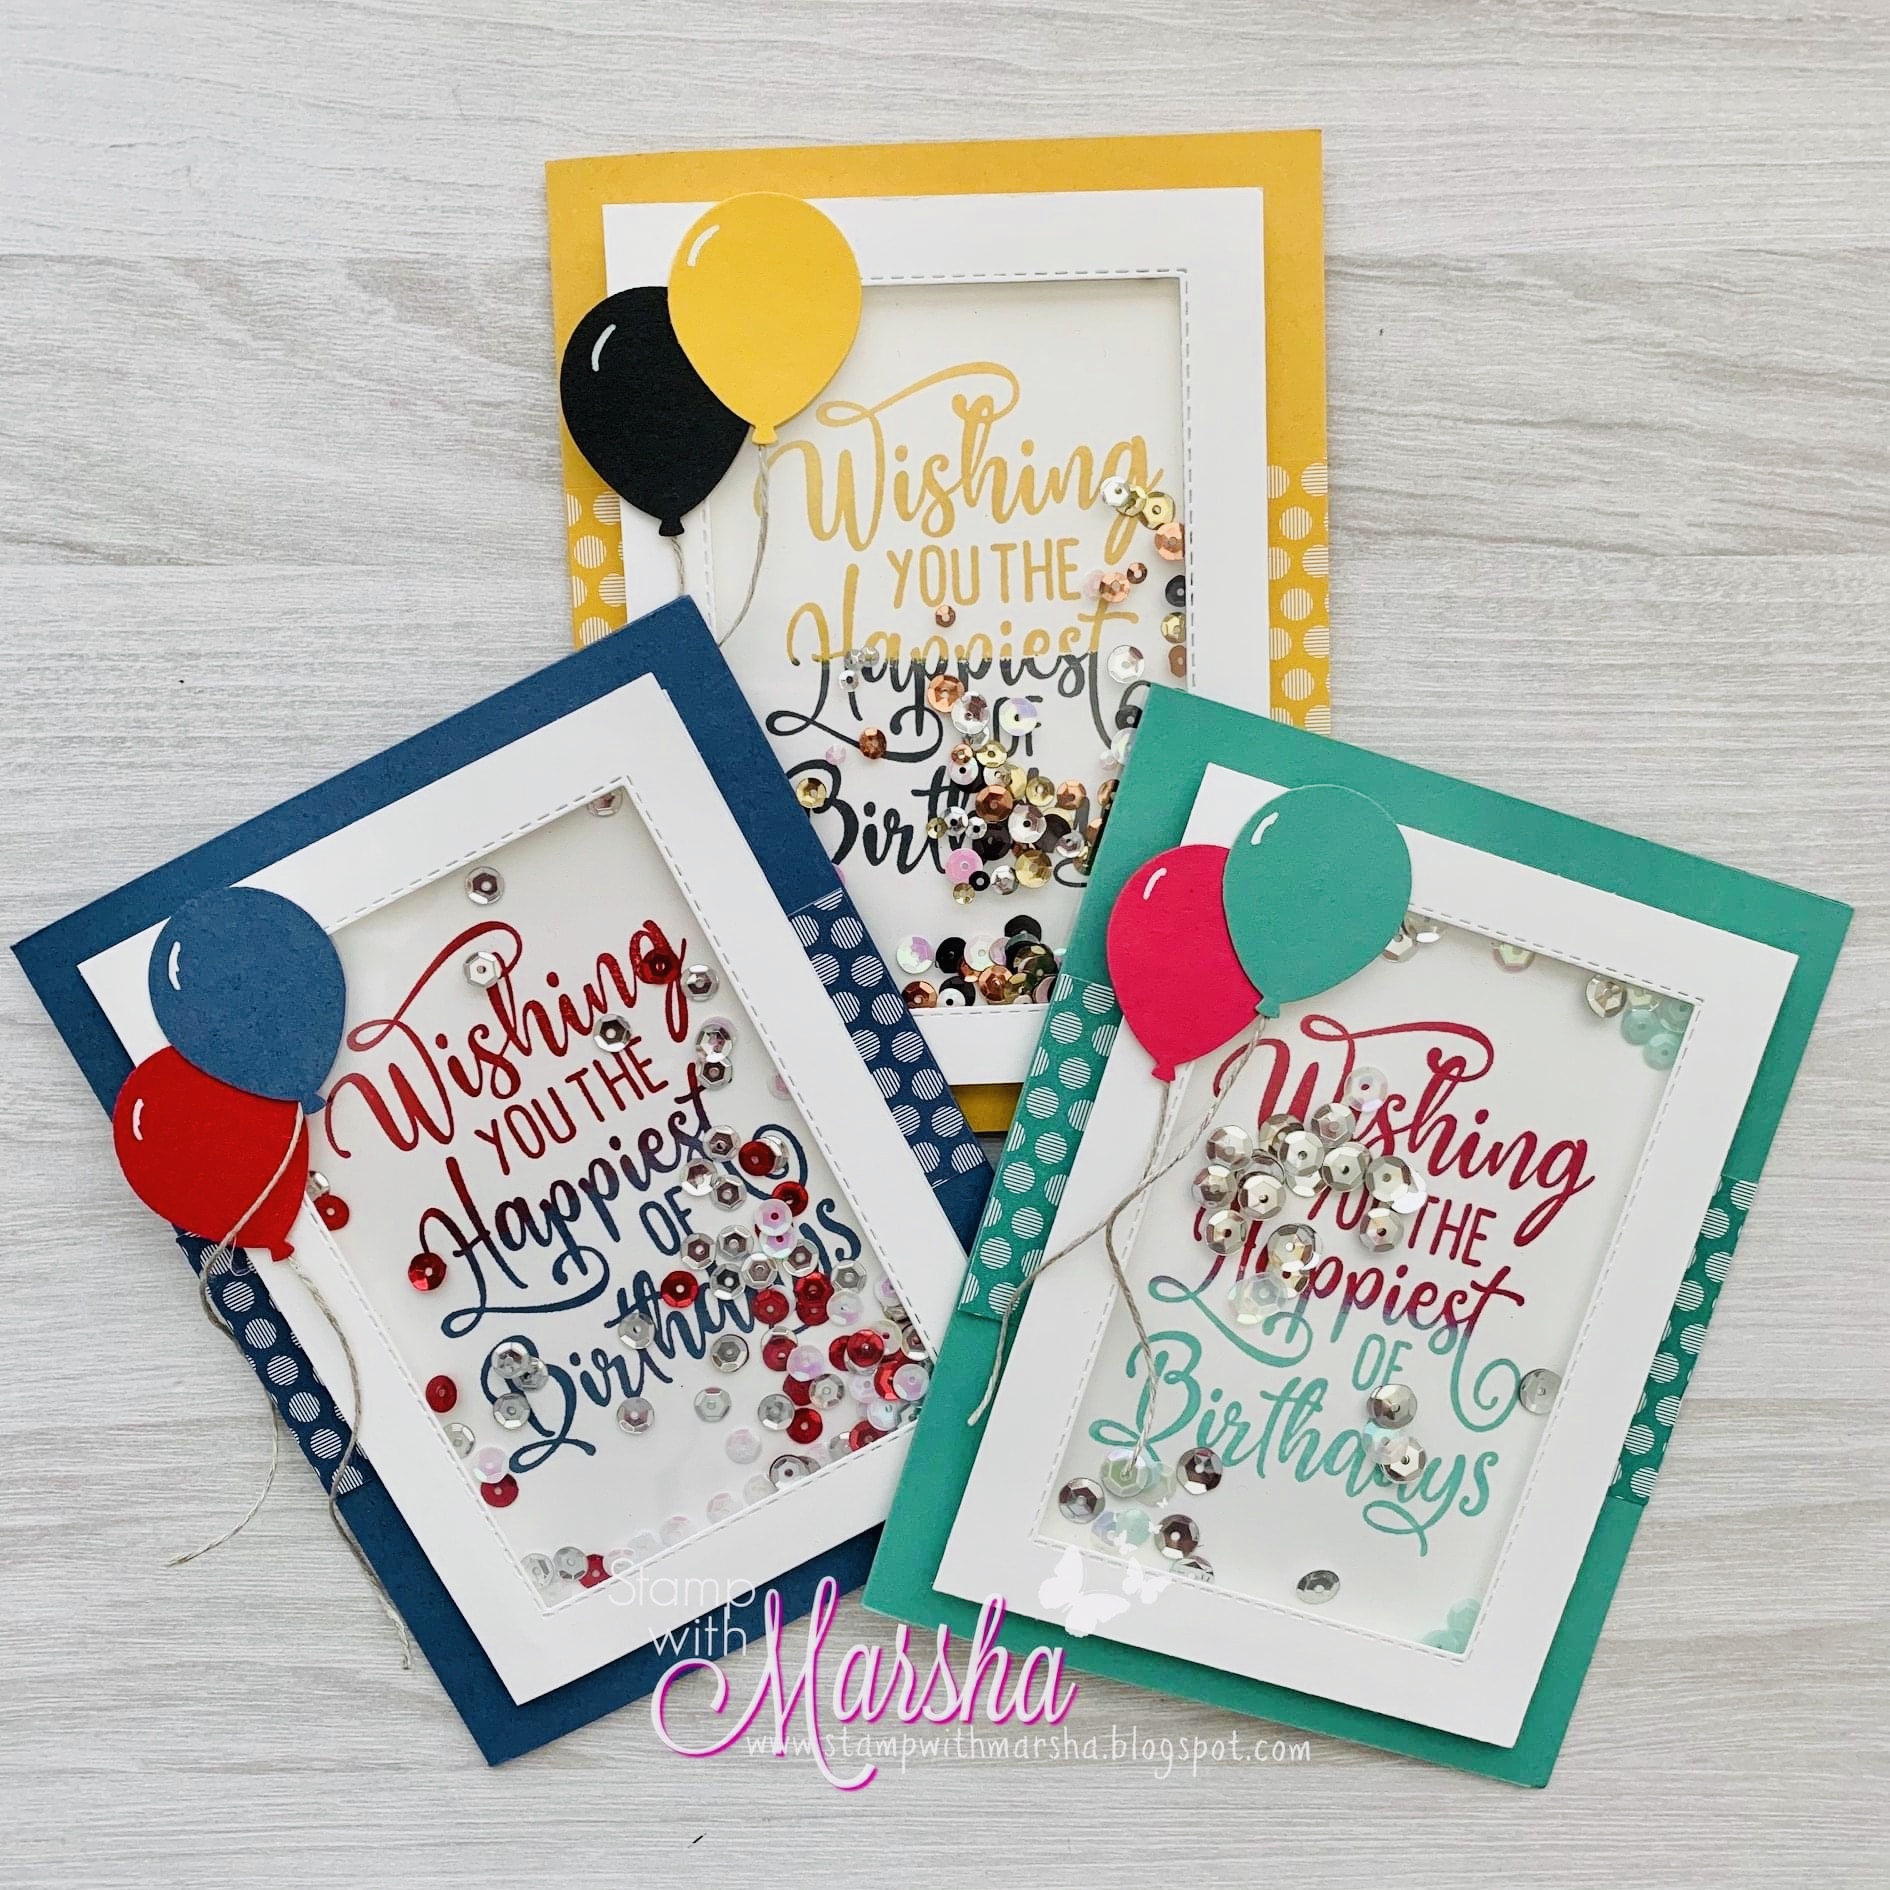
Happiest of Birthday Shaker Cards


Shaker cards are so much fun!  Today I showed how to make these cards on my Facebook Live video.  You can watch the video HERE to see how to put these together.  You will find the measurements and supply list below.

Measurements: 

  • Card Base: 5-1/2" x 8-1/2", folded in half (colors shown above are Just Jade, Misty Moonlight, and Bumblebee)
  • In Color DSP: 2" x 4-1/4"
  • White Cardstock to die-cut window: 3-9/16 (or 3-1/2 plus 1/16th), x 4-7/8"
  • White cardstock to stamp and lay behind the window: 3-1/2" x 4-3/4"
  • White cardstock for the inside: 4" x 5-1/4"
  • Window sheet: 3" x 4-1/4" (you may want wider than 3")
Here are some other cute shaker cards I made today with the Whale of a Time suite.

Thank you for stopping by today!  Please use the following host code on your online orders placed in August: Q7A4NMBX. If your order is $50 or more, you will receive a package of Snowflake Sequins or Jingle Bells.  Email your choice to me after you place your order.  If your order is over $150, do not use the host code as you will get your own host rewards AND the free gift from me.

Happy Stamping!
Marsha

P.S. The ink pads listed below are for the Just Jade/Melon Mambo version of the card that was made on Facebook Live today.

Product List