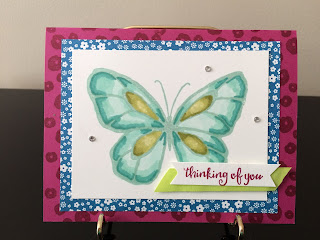
When Stampin' Up first started selling Stampin' Blends, I thought I didn't need them. I already had all of the markers (two sets actually), the water-color pencils, and an aqua-painter. Wasn't that enough? I decided to buy a few Stampin' Blends and see what all the rage was about. The first time I used them, I thought it had the same effect as an aqua-painter and ink refill. I could live without them...or so I thought. The more I used them, the more I loved them. My colored images started looking much more professional! I loved how the colors melded together as they sat. No marker lines showed which was one of the best features. I also liked that I didn't have to deal with water and trying to get the right amount of water to ink so I didn't end up with strange blotches of dark color on my images. I didn't have to worry about that with Stampin' blends. They are so easy and convenient to use and the finished product always looked good! Now they really are my favorite coloring tool that I can't live without! I am slowly working my way toward owning every color.
Today's project is really simple. I made some sweet 3" x 3" monochromatic cards. I saw samples like this at the April 2017 OnStage, where I also won the Beautiful Day stamp set. This set is perfect for trying out those blends. I had to stop myself from making a card in every color
Aren't they sweet and simple? I like the 3" x 3" size because there are times I want to give a little note with a gift or plate of goodies and I don't actually have a lot to say. LOL! This size of card is perfect.
Measurements:
Card base: 6" x 3", score at 3"
White square: 2 1/2" x 2 1/2" (Use THICK white card stock since the Stampin' Blends do bleed through the other side quite a bit).
Procedure:
1. Stamp the rose on the white cardstock using Momento Black ink.
2. Use the dark color from the combo and color along the black stamped lines at the bottom of each petal, then fill in the rest of the petal with the light color, pulling some of the dark color in as you go.
3. Stamp your greeting in Versamark on black cardstock, sprinkle with white embossing powder, and heat emboss. I used the Word Window punch to punch out the words, then cut off the rounded sides of the strip to get a rectangle. This was easier than trying to perfectly stamp on that small piece of black cardstock. Stamp first on a big piece, heat emboss, then punch out.
I used Itty Bitty Greetings for the "A Little Hello" greeting. I made the yellow card with the "Hello Friend" greeting over a year ago and when I went to make more cards today, I realized I had sold the retired set that greeting came from. Darn it! I wish I would have hung on to that one. Oh well!
Here are a few other projects I made with this stamp set and Stampin' Blends. I cased them all from somewhere, but I'm afraid I didn't write down where.
 |
| This is the notecard size that comes with envelopes. |
 |
| Add caption |
 |
| Stamp on the front of vellum and emboss. Color on the back. I may have used regular markers for this one. |
Thank you for stopping by. I've been swamped lately, so my blog has been a bit neglected. Please join my facebook group--Happy Stampers with Marsha--to see my most up-to-date info. on classes and such.
The hostess code for August is GHUCYJGD. Please use this when placing an order online. If your order is over $50, you will receive a free package of either Rhinestone Basic Jewels or Pearl Basic Jewels (your choice) from me.
Happy Stamping!
~Marsha


