
Looking for that perfect gift for a teacher or co-worker? Why not make them a set of holiday tags? This cute idea came from Rhonda Wade and features many of Stampin' Up's punches. I LOVE the punches! I'm afraid some of these products have been so popular that they have completely sold out! I still wanted to share photos and dimensions because you can always change up the DSP. In fact, none of my tags look just like the ones Rhonda made. Her set was my inspiration. Use these ideas and change them to YOUR liking!
All of the supplies and measurements are listed below. You can also watch the YouTube playlist below to see me walk you through each tag design:
All of the supplies and measurements are listed below. You can also watch the YouTube playlist below to see me walk you through each tag design:
https://www.youtube.com/watch?v=49ms71_MQuE&list=PLnCslbKkQAGoB-X4XhJAydutft7pXwg8K
Let's start with the case.

Supply List:
Half-wide stamp case (4 in a package), item number 127552
Paper: Whisper White, Night of Navy, and Cherry Cobbler card stock; Wrapped in Plaid DSP
Embellishments: Gold Shimmer Ribbon, Gold Glitter Enamel Dots
Tools: Winter Knit 3D Embossing Folder, Pine Tree Punch, 2" Circle Punch
Directions:
- Cut Whisper White Cardstock 3 1/4" x 6 1/4" and emboss with the Winter Knit folder (use the blue embossing plate).
- Cut Wrapped in Plaid DSP 2 1/2" x 2 1/2", Cut Night of Navy card stock 2 3/4" x 2 3/4." Layer them together.
- Wrap some gold ribbon around the layered piece and tape on the back. Tie another piece of gold ribbon into a bow and use a glue dot to attach to the front.
- Punch out a 2" circle of Cherry Cobbler card stock. Use the Pine Tree punch to punch a tree out of the Wrapped in Plaid DSP.
- Attach the tree to the circle with dimensionals. Attach the circle to the plaid square piece with dimensionals. Glue the whole tree ensemble to the white background.
- Print the word "Tags" out from your computer and cut it the way you like it. Add to your project with a dimensionals and add a Gold Glitter dot.
- Open your case and slip the decorated piece in between the cellophane cover and the hard case. It will not cover the backside of the case, only the front and the side.
Ornament Tags/Mini Cards
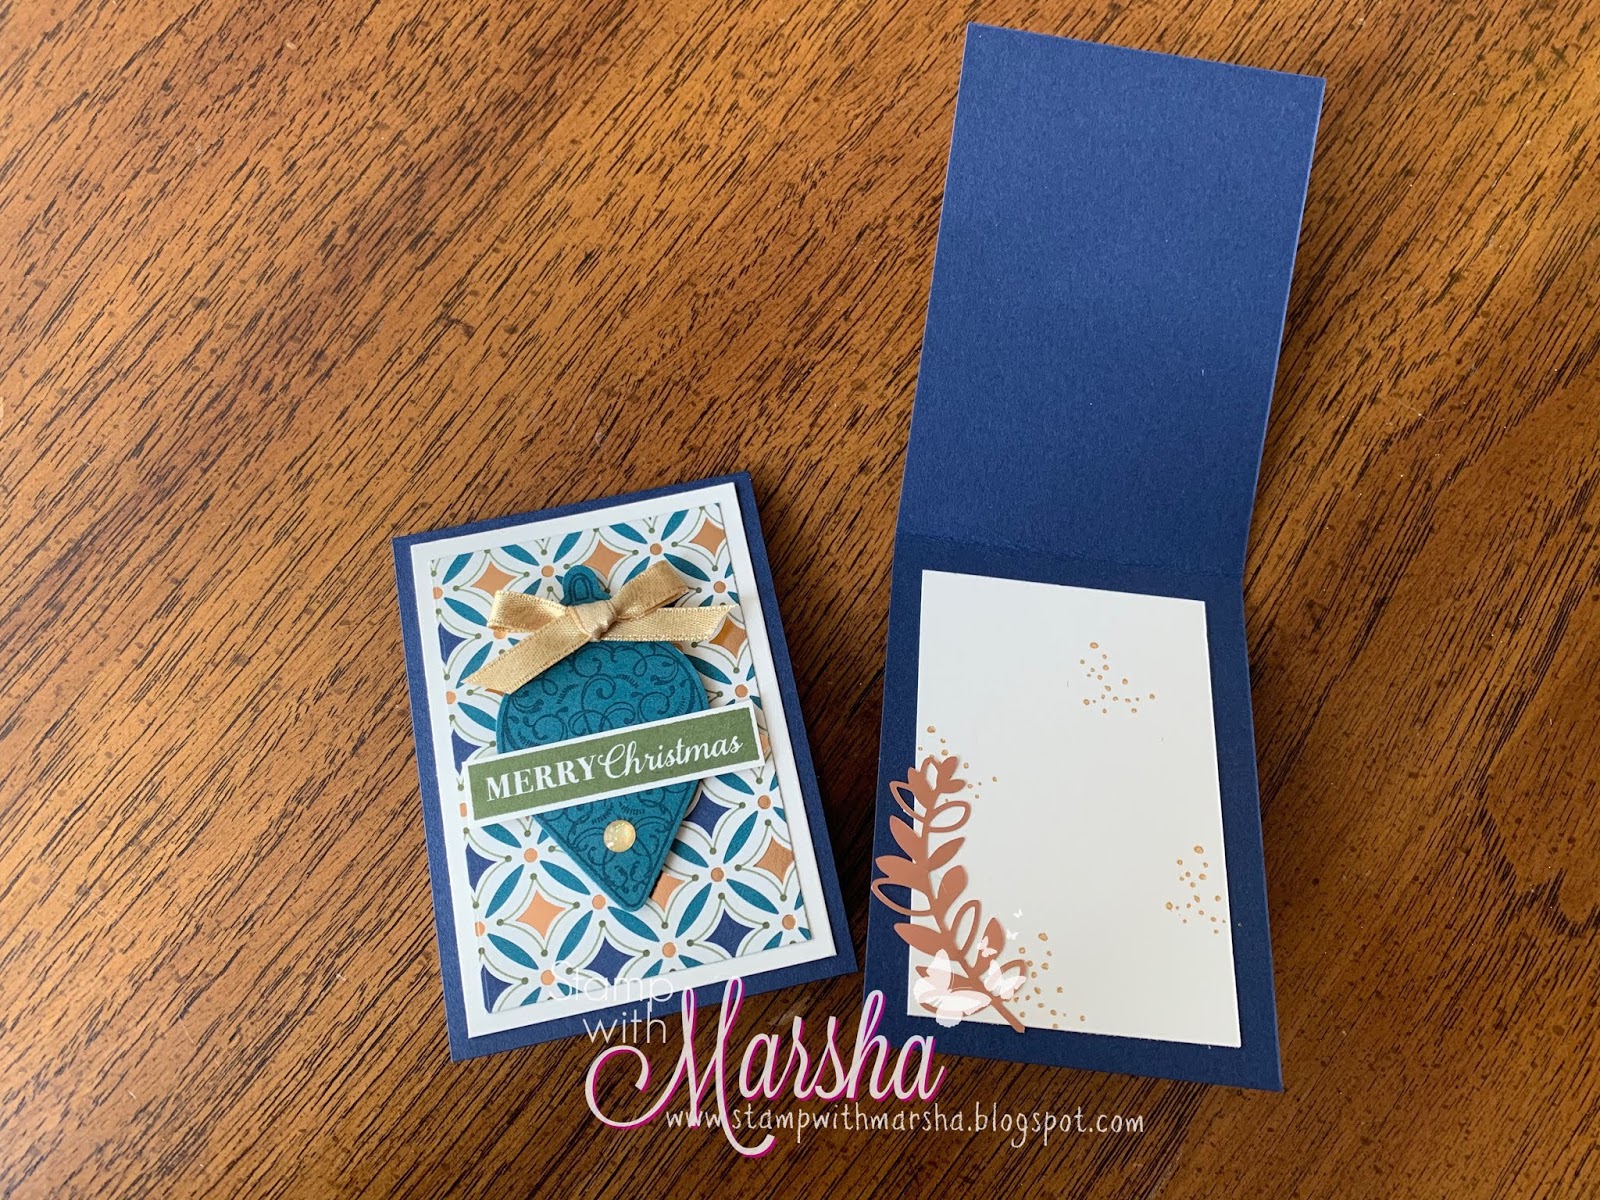 Supply List:
 Stamp Set: Christmas Gleaming
Ink: Mossy Meadow, Pretty Peacock
Paper: Very Vanilla, Night of Navy, Old Olive, and Pretty Peacock card stock; Brightly Gleaming DSP
Embellishments: Gold Shimmer Ribbon, Gold Glitter Enamel Dots
Tools: Gleaming Ornaments Punch Pack
Directions:
- Cut Night of Navy Cardstock 2 1/2" x 7." Fold in half.
- Cut Brightly Gleaming DSP 2" x 3" (I used different patterns on each tag, see first photo). Cut Very Vanilla card stock 2 1/4" x 3 1/4." Layer them together and attach to card base.
- Stamp your ornaments on Old Olive or Pretty Peacock cardstock (I did one of each in both ornament designs). Punch out.
- Stamp your greeting in Mossy Meadow or Pretty Peacock on a scrap of Very Vanilla cardstock and fussy cut (I did one of each).
- Use dimensionals to add ornaments to the cards. Glue the greeting on top of the ornament. Tie a bow with the Gold Shimmer ribbon and attach with a glue dot.
- Add a Gold Glitter dot under the greeting.
- I added a 2" x 3" piece of Very Vanilla cardstock to the inside and embellished with Brightly Gleaming Foil Elements.
Pine Tree Tags/Mini Cards
 Supply List:
Stamp Set: Perfectly Plaid
Ink: Shaded Spruce
Paper: Whisper White, Cherry Cobbler, and Shaded Spruce cardstock; Wrapped in Plaid DSP, Gold Foil Sheets
Embellishments: Linen Thread, Gold Glitter Enamel Dots
Tools: Pine Tree Punch
Directions:
- Cut Cherry Cobbler or Shaded Spruce Cardstock 2 3/4" x 5 1/2." Fold in half.
- Cut Brightly Gleaming DSP 1 1/2" x 2 3/4" Attach to card base.
- Punch out a 2" circle from the Gold Foil sheet and attach to the card.
- Stamp the tree in Shaded Spruce ink on white cardstock and punch out with the Pine Tree punch. Attach to the card with dimensionals.
- Tie a bow with Linen Thread and attach to the tree base with a rolled up glue-dot.
- Add Gold Glitter Dots.
- Cut white card stock 2 1/2" x 2 1/2" and add to the inside of the card. Stamp the greeting from the set if desired.
Snowman Tags

Stamp Set: Snowman Season
Ink: Black Memento and Pool Party stamp pads, Light Pool Party and Dark Pumpkin Pie Blends
Paper: Whisper White, Pool Party card stock; Let it Snow and Feels Like Frost DSP
Embellishments: Polka Dot Tulle Ribbon, retired baker's twine.
Tools: Snowman Builder Punch, Scalloped Tag Topper Punch
Directions:
- Cut Whisper White or Pool Party cardstock at 2" x 7 1/2". Fold in half.
- Put the folded card into the Scallop Tag Topper Punch, with the fold end going in first. Before punching, make sure it isn't all the way in. You need to pull it out enough that the top part doesn't get punched so you can keep the fold.
- Stamp snowflakes in Pool Party ink on the front and inside of the tags.
- Cut the DSP into 2" squares and add to the tag fronts.
- Tie some Polka-dot Tulle ribbon around the front piece of the tag.
- Stamp your snowman on scrap pieces of white card stock. Add a little color to the nose and body with Stampin' Blends. Punch out and attach to the front of the tag with dimensionals.
- Punch out the arms in Early Espresso card stock and the hat in Basic Black card stock. Glue your arms to the card base and add the hat with a mini-dimensional. Cut a tiny strip of Real Red Glimmer paper if you have it for the hat band. Alternatively, you can add hat, scarves, gloves, or arms from the Snowman Embellishment kit.
Circle Tags
 Supply List:
 Ink: Memento Black, Seaside Spray
Paper: Whisper White and Seaside Spray Cardstock, Silver Foil Sheets or Feels Like Frost DSP
Embellishments: Seaside Spray Metallic Ribbon, Rhinestones
Tools: 2 1/4" Circle Punch, 2" Circle Punch, 1 3/4 Circle Punch, Classic Label Punch
Directions:
- Cut Seaside Spray card stock to 8 1/2" x 2 3/4" and fold in half. (This is much longer than you need, but it is easier to punch if you have extra). Line up the fold just shy of the edge of the 2 1/4" punch so that it does not cut the fold completely.
- Punch a 2" circle layer in either Whisper White Cardstock or Silver Foil Sheets (see photo at the beginning for the two variations).
- Punch a 1 3/4" circle layer in either Feels Like Frost DSP (silver side) or Whisper White cardstock.
- If you used the white circle for your top layer, stamp the small ornament from the Christmas Gleaming stamp set in Seaside Spray ink. Color in with Wink of Stella.
- Stamp your greeting on scraps of Whisper White or Seaside Spray cardstock and punch out with the Classic Label Punch. (I sprayed my Seaside Spray card stock with Champagne shimmer paste mixed with alcohol first to make it shine).
- Attach your greetings with mini-dimensionals and add rhinestones.
- Make a bow with your Seaside Spray ribbon and add to the top of your tag with a glue dot.
- Add a 2" white circle to the inside of the tag if desired.
I made two of each tag type, slightly changing the design on each, for a total of 8 tags. When your tags are complete, add them to your case and your gift is ready to go!


I hope you enjoy this project. Let me know if you decide to try making these!
Planning to order in December? Please use the following code: 6PDNKY4B.
If your order is over $50, you will receive a free gift from me--Glimmer Paper if you are local or Linen Thread if you are long distance. If you place a $50 order on December 11th, you will also get free shipping!
Happy Stamping!
Marsha