Wednesday, April 1, 2020

Hershey Nugget Mini-Boxes

I love this little box!  It's quick and easy to make and it's perfect for giving a little chocolate treat.  Slip some money in with the chocolates to make it even more exciting! My friend, Christy Tobin, gave me the bee version of the box and I loved it!  I had to try it with a variety of different papers.  It was hard to stop!  The box and the nugget wraps all come out of ONE 6" x 6" sheet of DSP.  Cool eh?

You can see a video of me making this box on my Facebook page HERE. 

Measurements:
  1. Start with a 6" x 6" piece of DSP.
  2. Cut 2 inches off one side; then cut that piece into four 1" x 3" strips (to wrap around the nuggets).
  3. Take the remaining piece of DSP (4" x 6") and score 5/8" in from each side.
  4. With 6" side at the top, score at 2-5/8" and 3 1/4."
  5. Cut along the small score lines to get flaps, but don't cut any flaps off.
  6. Notice that one panel of the box is slightly bigger than the other panel, that is the box lid.  Use 1/2" punch to give a half-moon shape at the top edge of the lid.
  7. Adhere your small flaps to the inside of the long edges.  The top lid will have flaps adhered inside both ends (much easier to understand on video than to explain in writing).
  8. Use tear tape or glue dots on the end of each 1" strip to attach it to the nuggets.
  9. Voila, the box is done!
I made a whole bunch of the bee boxes as party favors for my Honeybee Stamp Camp.  It was so fun!


Supplies for Bee version (DSP and cording are retired): 

Product List
Gold Cording Trim
Gold Cording Trim
[139618]


Supplies for Parrot version:

Product List

Supplies for Parisian Blossom Version:

Product List (should say Stitched Shapes dies, not Stitched Labels Dies)


Supplies for Poppies version (stamp set is retired):
Product List


Thank you for visiting my blog.  You'll have to give this box a try! Please use the April Host Code on online orders this month: MX2JHDEW. If your order is over $50, you will receive Polka Dot Tulle ribbon as a gift from me! If your order is over $150, do not use the code as you will earn the host rewards for yourself plus get the ribbon!

Happy Stamping!

Marsha

Wednesday, March 11, 2020

Ladybug Fun Fold Card


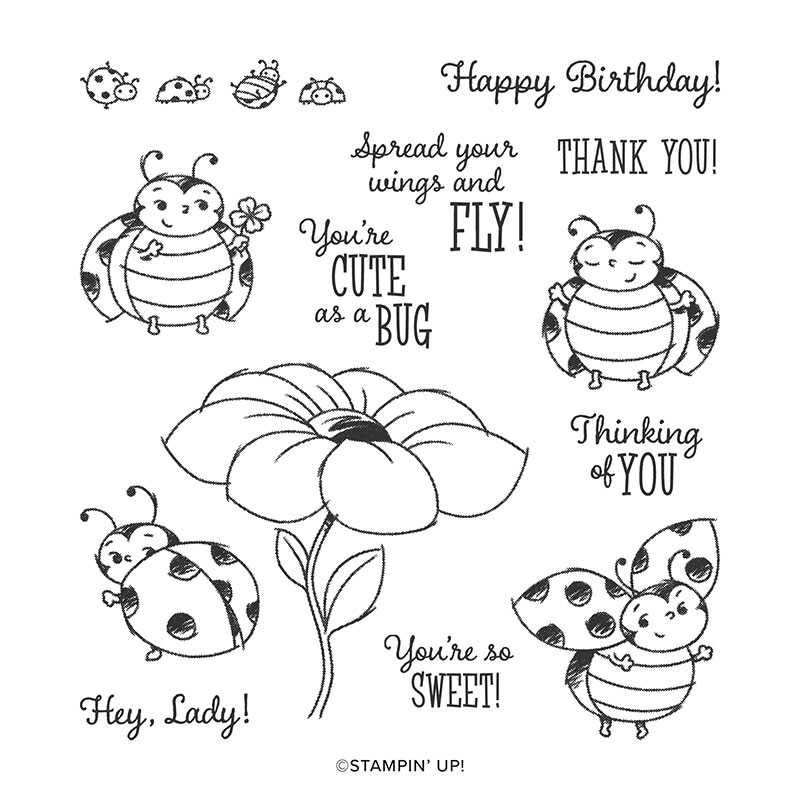
The Little Ladybug host set is SO adorable!  You can get it free during Sale-A-Bration when you place a $300 order or host a party totaling $300 or more in sales.  Not ready to spend that much?  Place an order of $50 order or more before the end of March and your name will be entered in a drawing to win the stamp set from me for free!  The winner will be announced April 1st.


I found the measurements for this fun fold card on Julie Davison's blog HERE.  She also has a video which is helpful to watch!  Some of the punches are retired, but you can make the same design using dies instead of punches.

Measurements:
  • Black Cardstock: 4-1/4" x 11", with 11" side at the top, score at 2-1/2" and 6-3/4."  After you score, trim 1/16" to 1/8"  off the bottom (the flap that folds up) so it will close nicely.
  • Flower DSP: 4" x 3-7/8"
  • White Cardstock: 4"x 4" for inside; 2" circle
  • Red Cardstock: Punch one scallop circle with the 2 3/8" scallop punch (retired); punch two small flowers with the Small Bloom Punch (SAB item)
Tips:
  • Watch Julie's video (link above) as it makes the remaining steps easy to understand! :)
  • I used the 2 1/2" circle punch on the black cardstock. Push it all the way in from the edge with the score line down the middle.  I did this first, then attached my white cardstock inside, and punched again to get rid of the white half-circle.  You could attach and then punch, but this makes it easier to punch.
  • To get your scallop circle in the exact right spot, it's best if you attach your DSP and fold the card with both flaps closed, then put adhesive on the half circle part where the DSP is, and add your scallop circle.
  • Curl up the edges of your two small bloom flowers and attach to each other with a glue dot.  Attach to the card with a dimensional in the spot that will just keep the top flap closed so it doesn't pop open.
  • I used Stampin' Blends to color all of my images.  Supplies listed at the end of this post.

Thank you for visiting my blog.  I hope you enjoy making this sweet ladybug card.  You can scroll to the end of this post to see a list of supplies used and add items to your cart.  If you place an order, please use the March Host Code: WHJZQYQ3. If your order is over $150, do not use the code as you will earn the host rewards for yourself!  As a reminder, you can choose a free sale-a-bration item with every $50 purchased (before shipping and tax); you will also get a free package of envelopes as a gift from me for ordering in March, AND you'll enter the drawing for the free Ladybug set.

Happy Stamping!

Marsha


Product List

Tuesday, February 4, 2020

Love Banner


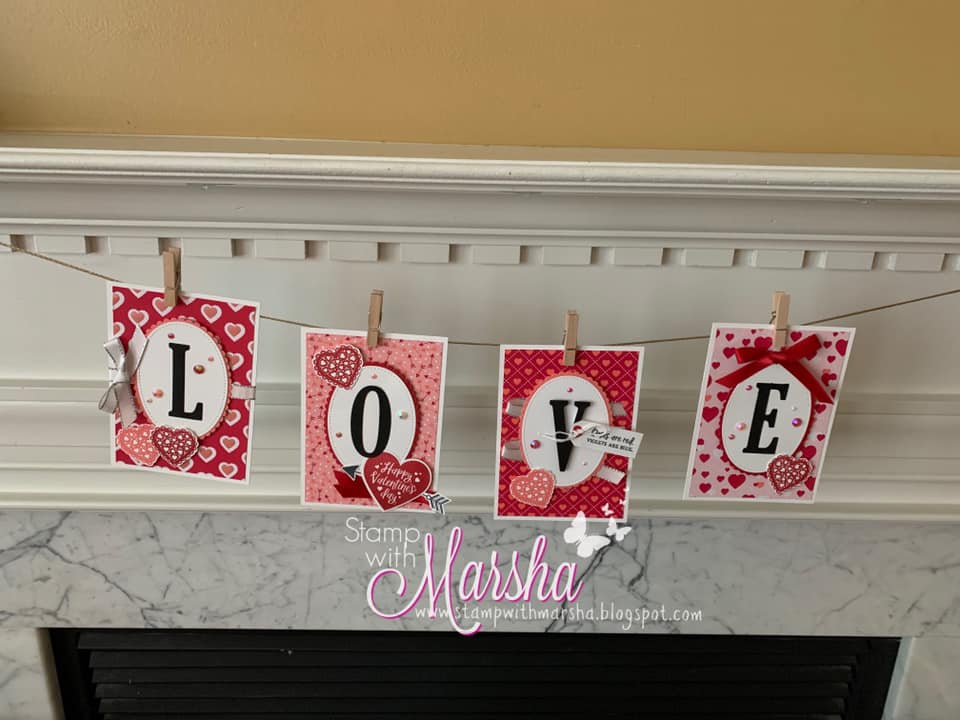
Love is in the air!  The From My Heart Suite in the Mini Catalog is perfect for making cards, party favors, and home decor items. We made this Love banner at my recent Bingo event.  This banner was inspired by a Fall banner I saw created by B.J. Peters HERE.  I used her measurements and just changed the decor from fall to a Valentine's theme.  The beautiful DSP and gems do most of the work!  Guests could choose to hang their banner horizontally (as shown above) or veritcally (as shown below).  Vertical was the winner! 

Measurements:
  • DSP layer on each card: 3-1/2" x 5"
  • Thick White Cardstock Layer: 3-3/4" x 5-1/4"
  • Whisper White tag piece: 2" x 3/4" (trim after stamping if needed)
  • For the ovals, I used the largest stitched oval die for the white pieces and the largest layering scallop die for the scalloped mat behind the white oval.
  • Die-cut your letters from Basic Black Cardstock (I forgot to add it in the supply list below)
Tips for all 4 Cards:
  • Add the gems after completing each card.  I squirted a few tiny dots of glue on the card, then added gems using craft tweezers to help me pick up those tiny ones!
  • Glue your white stitched oval piece to the scalloped oval, then attach the ovals to the card base with dimensionals.
  • The letters are all glued flat EXCEPT for the V letter which is lifted on foam strips after you tie the tag to it.
  • Before putting each card together, stamp all of your small scalloped hearts in Real Red (3) or Flirty Flamingo (2), then fussy cut (or use Scan-n-Cut if you have one).  You will also need to stamp the arrow in Basic Gray and fussy cut. 
L Card--Cut two pieces of ribbon, one about 6" and one about 10".  Wrap the 6" piece around the front of your DSP and tape on the back.  You can do this before or after you attach the DSP to the white base.  Put the rest of your card together as shown, using dimensionals under the scallop oval piece and both hearts.  Tie a bow out of the 10" each piece of ribbon and attach to the card with a glue dot or tear tape.

O Card--Add the letter O last so it can overlap your heart a bit.  Stamp the large heart in red and punch it out.  Tape the arrow to the back of the large heart.  Attach your DSP to the card base and add your ovals to the front with dimensionals.  Fold 6-7" of red ribbon in half and attach to the bottom of the card with a strip of tear tape.  Put mini dimensionals on the card to attach the heart but avoid putting them where they will land on the ribbon.  Glue your O down.

V card--Attach your DSP to the card base, then put a strip of tear tape down the middle of the card as shown in the photo.  Peel the backing off the tear tape and use it to hold your ribbon in place as you lay it across the card.  Put mini-dimenisonals on your card base, avoiding the ribbon, then attach your oval.
  

Stamp your tag and trim the top two edges with scissors to get the shape shown.  Tie it to your V with the twine, or just make a bow with the twine and add it with a glue dot.  I used adhesive foam strips to add the letter to the card, avoiding the place where the twine was, but if you don't tie the twine around, you could glue it flat and add the tag with dimensionals.

E Card--Put a mini dimensional right above the oval to lift the bow.  Use a glue-dot on the back of the bow as well since the dimensionals don't stick well to ribbon.

Watch the video below to see how to make this into a vertical banner.


Horizontal Banner--Attach your cards to string with mini-clothespins.  Then tape or tie the string where you want it. 


Thank you for visiting my blog.  I hope you enjoy making this banner!  You can scroll to the end of this post to see a list of supplies used and add items to your cart.  If you place an order, please use the February Host Code: PKBHVTQ4. If your order is over $50, you will receive a free package of medium envelopes from me, plus you will get to choose a free Sale-A-Bration item at check-out!

Happy Stamping!

Marsha


Product List