Tuesday, February 4, 2020

Love Banner


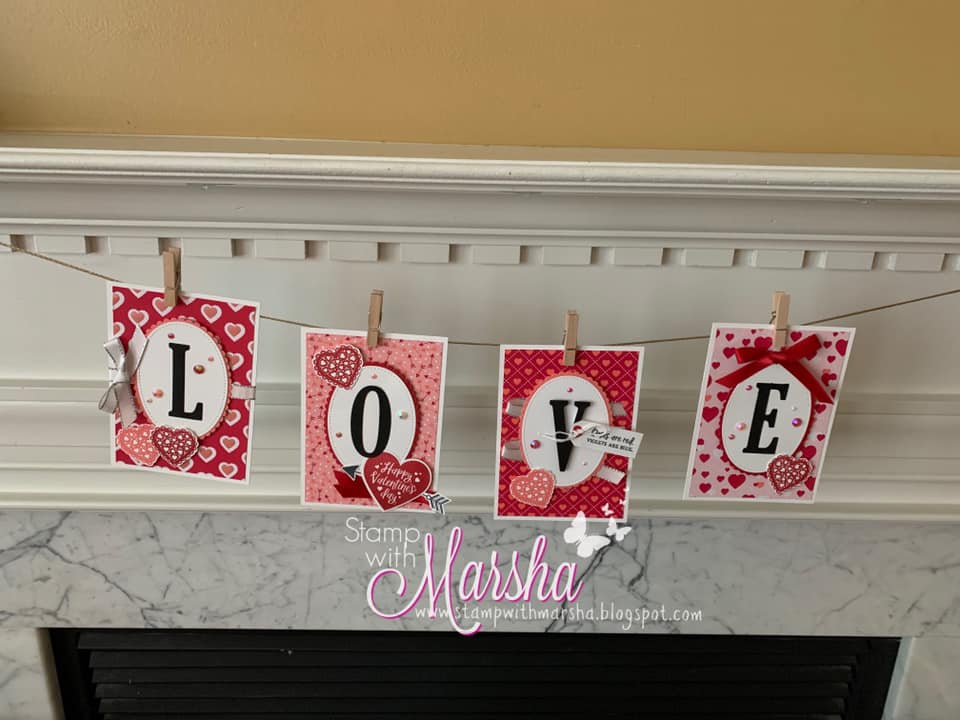
Love is in the air!  The From My Heart Suite in the Mini Catalog is perfect for making cards, party favors, and home decor items. We made this Love banner at my recent Bingo event.  This banner was inspired by a Fall banner I saw created by B.J. Peters HERE.  I used her measurements and just changed the decor from fall to a Valentine's theme.  The beautiful DSP and gems do most of the work!  Guests could choose to hang their banner horizontally (as shown above) or veritcally (as shown below).  Vertical was the winner! 

Measurements:
  • DSP layer on each card: 3-1/2" x 5"
  • Thick White Cardstock Layer: 3-3/4" x 5-1/4"
  • Whisper White tag piece: 2" x 3/4" (trim after stamping if needed)
  • For the ovals, I used the largest stitched oval die for the white pieces and the largest layering scallop die for the scalloped mat behind the white oval.
  • Die-cut your letters from Basic Black Cardstock (I forgot to add it in the supply list below)
Tips for all 4 Cards:
  • Add the gems after completing each card.  I squirted a few tiny dots of glue on the card, then added gems using craft tweezers to help me pick up those tiny ones!
  • Glue your white stitched oval piece to the scalloped oval, then attach the ovals to the card base with dimensionals.
  • The letters are all glued flat EXCEPT for the V letter which is lifted on foam strips after you tie the tag to it.
  • Before putting each card together, stamp all of your small scalloped hearts in Real Red (3) or Flirty Flamingo (2), then fussy cut (or use Scan-n-Cut if you have one).  You will also need to stamp the arrow in Basic Gray and fussy cut. 
L Card--Cut two pieces of ribbon, one about 6" and one about 10".  Wrap the 6" piece around the front of your DSP and tape on the back.  You can do this before or after you attach the DSP to the white base.  Put the rest of your card together as shown, using dimensionals under the scallop oval piece and both hearts.  Tie a bow out of the 10" each piece of ribbon and attach to the card with a glue dot or tear tape.

O Card--Add the letter O last so it can overlap your heart a bit.  Stamp the large heart in red and punch it out.  Tape the arrow to the back of the large heart.  Attach your DSP to the card base and add your ovals to the front with dimensionals.  Fold 6-7" of red ribbon in half and attach to the bottom of the card with a strip of tear tape.  Put mini dimensionals on the card to attach the heart but avoid putting them where they will land on the ribbon.  Glue your O down.

V card--Attach your DSP to the card base, then put a strip of tear tape down the middle of the card as shown in the photo.  Peel the backing off the tear tape and use it to hold your ribbon in place as you lay it across the card.  Put mini-dimenisonals on your card base, avoiding the ribbon, then attach your oval.
  

Stamp your tag and trim the top two edges with scissors to get the shape shown.  Tie it to your V with the twine, or just make a bow with the twine and add it with a glue dot.  I used adhesive foam strips to add the letter to the card, avoiding the place where the twine was, but if you don't tie the twine around, you could glue it flat and add the tag with dimensionals.

E Card--Put a mini dimensional right above the oval to lift the bow.  Use a glue-dot on the back of the bow as well since the dimensionals don't stick well to ribbon.

Watch the video below to see how to make this into a vertical banner.


Horizontal Banner--Attach your cards to string with mini-clothespins.  Then tape or tie the string where you want it. 


Thank you for visiting my blog.  I hope you enjoy making this banner!  You can scroll to the end of this post to see a list of supplies used and add items to your cart.  If you place an order, please use the February Host Code: PKBHVTQ4. If your order is over $50, you will receive a free package of medium envelopes from me, plus you will get to choose a free Sale-A-Bration item at check-out!

Happy Stamping!

Marsha


Product List

Thursday, January 16, 2020

M & M Candy Sleeve


The From My Heart suite on p. 9 of the Mini Catalog was one of the first new suites to catch my eye.  It includes two different heart punches!  I love punches more than dies because they are so quick and easy, especially when making multiples.  I saw a Christmas version of this candy bar sleeve made by Stacey Cogswell on the Demonstrator Facebook page and wanted to try a Valentine version for our recent Super Saturday event.

Measurements:
  • Flirty Flamingo Cardstock (box wrap): 6" x 7"; with 7" side at the top, score at 1/2", 1 1/4", 3 3/4", 4 1/2"
  • From My Heart DSP: 2" X 5 1/2"
  • Whisper White Cardstock: 2 1/4" x 5 3/4"

Instructions:
  1. Assemble your sleeve by folding on your score lines.  Attach a strip of tear tape to the 1/2" flap and wrap it around an M&M box, tucking the flap under the other end of card stock so it doesn't show.
  2. Add your white layer and DSP layer to the box top.
  3. Tie Real Red Double-Stitched Satin Ribbon around the box.
  4. Stamp the "Happy Valentine's Heart" from the Heartfelt stamp set in Real Red ink on white cardstock.  Punch out with the heart punch.
  5. Stamp the lacy heart in Real Red ink on white cardstock.  Punch out with the scallop heart punch.
  6. Punch out the third heart from the DSP with the plain heart punch.  Use the scallop heart punch to punch another heart out of Real Red Cardstock.
  7. The middle heart is lifted up on dimensionals, the other hearts are taped flat to the box front.
Here is the Christmas version I made of this box, cased from Stacey Cogswell.

This candy sleeve is perfect for all kinds of holidays and occasions.  I plan to try a birthday design next.  I would love to see what you make!

Placing an order this month?  Use the January host code and get a free ink pad with your order of $50 or more, PLUS a free Sale-a-Bration item!  January host code: MCQ7W2SR

Happy Stamping!
~Marsha
  • Would you like a chance to win free product from the Mini Catalog? Read about Stampin' Bingo HERE.
  • Need a stamping tool kit?  Check it out HERE.
  • Would you like a sample of all the DSP in the new catalog?  Learn more about my paper share HERE.


Friday, January 3, 2020

Snowman Hershey Bar Wrap

Happy 2020! Although Christmas has passed, I thought I would share one last project since snowmen are still around in January....at least I'm hoping for some January snow!  I found a picture tutorial for this adorable snowman from Twila Davis HERE.  I changed the greenery a little since I didn't have the punch she used.  In the photo above, I used a smaller circle punch for the buttons, but I ended up liking it better using the same punch for both the eyes and the buttons.  See the difference below.

Check out my quick tutorial video on facebook HERE, or read on for written instructions.

Supplies

  • Hershey Bar
  • Red Fleece: ½” x 12,” trim the ends to get a fringe pattern
  • Whisper White cardstock: 5 ½” x 5 ¾”
  • Basic Black Cardstock: 3/8” x 5 ¾” strip (for hat band); 1 1/8” x 1 ¾” (for hat top); 5 circles for eyes and nose; I used the Cookie Cutter Christmas punch to get the circles
  • Real Red Cardstock: 3/16” x 1 ¾”
  • Pumpkin Pie Cardstock: scrap cut into a triangle nose shape
  • Sprig punched out of Granny Apple Green Cardstock with the Sprig Punch
  • Red Rhinestone Basic Jewels
  • Black Sharpie Marker
  • White gel pen

Instructions
  1. Put tear tape on one of the 5 ½” ends of your white cardstock. Use a bone folder to slightly curve your cardstock in the direction you want it to go when you wrap it. Wrap the cardstock around the Hershey bar and attach to the other end of the cardstock (not to the bar itself so you can slide the wrap off if needed).
  2. Tie the fleece around the bar into a scarf.
  3. Use glue or glue dots to add your black circles for the eyes and buttons, and the nose. Draw the mouth with a black Sharpie. Note: The photo shows two different sized for the buttons and the eyes, but I ended up like it best with the same size for both.
  4. Put tear tape in the middle of your black hat band strip and attach the black rectangle piece to it (so it’s behind the band). Attach the red piece above the band. Put tear tape on both ends of the hat band and wrap it around the top of the snowman’s head.
  5. Cut off the top pieces of your green sprig and attach with glue.
  6. Add red rhinestones.
  7. Draw white lines on the eyes with a white gel pen.
I made a bunch of these cute little guys for my piano students.  It was a fun project!

Did you know it's Sale-A-Bration time?  You can choose a free stamp set or other item for every $50 you spend!  Check out the awesome choices HERE.  You will also get a free gift from me when you order $50 at my online store and use the January hostess code at check out: MCQ7W2SR


Hope your year is off to a great start.  Happy Stamping!

~Marsha


Monday, December 9, 2019

Holiday Tags Gift Set


 Looking for that perfect gift for a teacher or co-worker?  Why not make them a set of holiday tags?  This cute idea came from Rhonda Wade and features many of Stampin' Up's punches.  I LOVE the punches!  I'm afraid some of these products have been so popular that they have completely sold out!  I still wanted to share photos and dimensions because you can always change up the DSP.  In fact, none of my tags look just like the ones Rhonda made.  Her set was my inspiration.  Use these ideas and change them to YOUR liking!

All of the supplies and measurements are listed below.  You can also watch the YouTube playlist below to see me walk you through each tag design: 
https://www.youtube.com/watch?v=49ms71_MQuE&list=PLnCslbKkQAGoB-X4XhJAydutft7pXwg8K

Let's start with the case.
Supply List: 
Half-wide stamp case (4 in a package), item number 127552

Paper: Whisper White, Night of Navy, and Cherry Cobbler card stock; Wrapped in Plaid DSP

Embellishments: Gold Shimmer Ribbon, Gold Glitter Enamel Dots

Tools: Winter Knit 3D Embossing Folder, Pine Tree Punch, 2" Circle Punch


Directions:
  1. Cut Whisper White Cardstock 3 1/4" x 6 1/4" and emboss with the Winter Knit folder (use the blue embossing plate).
  2. Cut Wrapped in Plaid DSP 2 1/2" x 2 1/2", Cut Night of Navy card stock 2 3/4" x 2 3/4." Layer them together.
  3. Wrap some gold ribbon around the layered piece and tape on the back.  Tie another piece of gold ribbon into a bow and use a glue dot to attach to the front.
  4. Punch out a 2" circle of Cherry Cobbler card stock. Use the Pine Tree punch to punch a tree out of the Wrapped in Plaid DSP.  
  5. Attach the tree to the circle with dimensionals.  Attach the circle to the plaid square piece with dimensionals.  Glue the whole tree ensemble to the white background.
  6. Print the word "Tags" out from your computer and cut it the way you like it.  Add to your project with a dimensionals and add a Gold Glitter dot.
  7. Open your case and slip the decorated piece in between the cellophane cover and the hard case.  It will not cover the backside of the case, only the front and the side. 

 Ornament Tags/Mini Cards
Supply List: 
Stamp Set: Christmas Gleaming

Ink: Mossy Meadow, Pretty Peacock

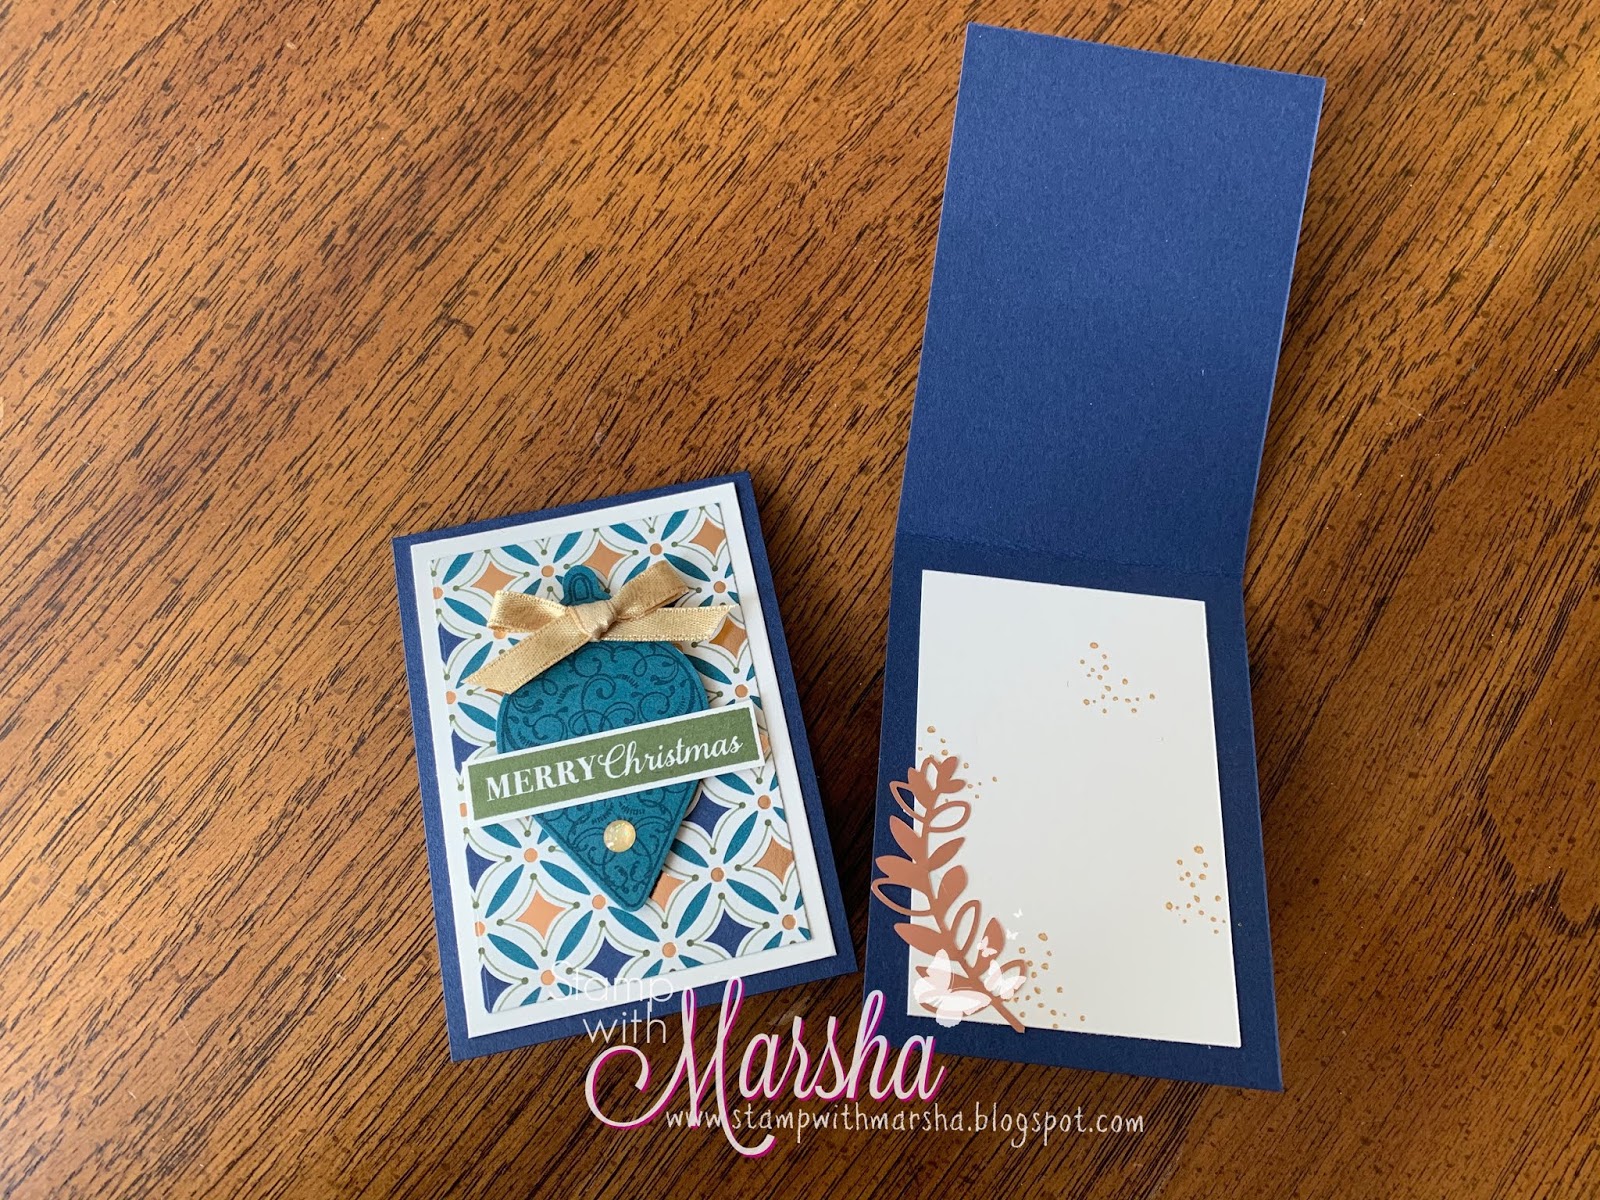
Paper: Very Vanilla, Night of Navy, Old Olive, and Pretty Peacock card stock; Brightly Gleaming DSP

Embellishments: Gold Shimmer Ribbon, Gold Glitter Enamel Dots

Tools: Gleaming Ornaments Punch Pack
Directions:
  1. Cut Night of Navy Cardstock 2 1/2" x 7." Fold in half.
  2. Cut Brightly Gleaming DSP 2" x 3" (I used different patterns on each tag, see first photo).  Cut Very Vanilla card stock 2 1/4" x 3 1/4." Layer them together and attach to card base.
  3. Stamp your ornaments on Old Olive or Pretty Peacock cardstock (I did one of each in both ornament designs).  Punch out.
  4. Stamp your greeting in Mossy Meadow or Pretty Peacock on a scrap of Very Vanilla cardstock and fussy cut (I did one of each).
  5. Use dimensionals to add ornaments to the cards.  Glue the greeting on top of the ornament.  Tie a bow with the Gold Shimmer ribbon and attach with a glue dot.
  6. Add a Gold Glitter dot under the greeting.
  7. I added a 2" x 3" piece of Very Vanilla cardstock to the inside and embellished with Brightly Gleaming Foil Elements.
Pine Tree Tags/Mini Cards

Supply List:

Stamp Set: Perfectly Plaid

Ink: Shaded Spruce

Paper: Whisper White, Cherry Cobbler, and Shaded Spruce cardstock; Wrapped in Plaid DSP, Gold Foil Sheets

Embellishments: Linen Thread, Gold Glitter Enamel Dots

Tools: Pine Tree Punch


Directions:
  1. Cut Cherry Cobbler or Shaded Spruce Cardstock 2 3/4" x 5 1/2." Fold in half.
  2. Cut Brightly Gleaming DSP 1 1/2" x 2 3/4" Attach to card base.
  3. Punch out a 2" circle from the Gold Foil sheet and attach to the card.
  4. Stamp the tree in Shaded Spruce ink on white cardstock and  punch out with the Pine Tree punch.  Attach to the card with dimensionals.
  5. Tie a bow with Linen Thread and attach to the tree base with a rolled up glue-dot.
  6. Add Gold Glitter Dots.
  7. Cut white card stock 2 1/2" x 2 1/2" and add to the inside of the card.  Stamp the greeting from the set if desired.
Snowman Tags

Stamp Set: Snowman Season

Ink: Black Memento and Pool Party stamp pads, Light Pool Party and Dark Pumpkin Pie Blends

Paper: Whisper White, Pool Party card stock; Let it Snow and Feels Like Frost DSP

Embellishments: Polka Dot Tulle Ribbon, retired baker's twine.

Tools: Snowman Builder Punch, Scalloped Tag Topper Punch

Directions:
  1. Cut Whisper White or Pool Party cardstock at 2" x 7 1/2". Fold in half.
  2. Put the folded card into the Scallop Tag Topper Punch, with the fold end going in first.  Before punching, make sure it isn't all the way in.  You need to pull it out enough that the top part doesn't get punched so you can keep the fold.
  3. Stamp snowflakes in Pool Party ink on the front and inside of the tags.
  4. Cut the DSP into 2" squares and add to the tag fronts.
  5. Tie some Polka-dot Tulle ribbon around the front piece of the tag.
  6. Stamp your snowman on scrap pieces of white card stock.  Add a little color to the nose and body with Stampin' Blends.  Punch out and attach to the front of the tag with dimensionals.
  7. Punch out the arms in Early Espresso card stock and the hat in Basic Black card stock.  Glue your arms to the card base and add the hat with a mini-dimensional.  Cut a tiny strip of Real Red Glimmer paper if you have it for the hat band.  Alternatively, you can add hat, scarves, gloves, or arms from the Snowman Embellishment kit.
Circle Tags
Supply List: 
Stamp Set: Greatest Part of Christmas Host Set, Christmas Gleaming (on one design)

Ink: Memento Black, Seaside Spray

Paper: Whisper White and Seaside Spray Cardstock, Silver Foil Sheets or Feels Like Frost DSP

Embellishments: Seaside Spray Metallic Ribbon, Rhinestones

Tools: 2 1/4" Circle Punch, 2" Circle Punch, 1 3/4 Circle Punch, Classic Label Punch


Directions:
  1. Cut Seaside Spray card stock to 8 1/2" x 2 3/4" and fold in half. (This is much longer than you need, but it is easier to punch if you have extra).  Line up the fold just shy of the edge of the 2 1/4" punch so that it does not cut the fold completely.
  2. Punch a 2" circle layer in either Whisper White Cardstock or Silver Foil Sheets (see photo at the beginning for the two variations).
  3. Punch a 1 3/4" circle layer in either Feels Like Frost DSP (silver side) or Whisper White cardstock.
  4. If you used the white circle for your top layer, stamp the small ornament from the Christmas Gleaming stamp set in Seaside Spray ink.  Color in with Wink of Stella.
  5. Stamp your greeting on scraps of Whisper White or Seaside Spray cardstock and punch out with the Classic Label Punch.  (I sprayed my Seaside Spray card stock with Champagne shimmer paste mixed with alcohol first to make it shine).
  6. Attach your greetings with mini-dimensionals and add rhinestones.
  7. Make a bow with your Seaside Spray ribbon and add to the top of your tag with a glue dot.
  8. Add a 2" white circle to the inside of the tag if desired.
I made two of each tag type, slightly changing the design on each, for a total of 8 tags.  When your tags are complete, add them to your case and your gift is ready to go!


I hope you enjoy this project.  Let me know if you decide to try making these!

Planning to order in December?  Please use the following code: 6PDNKY4B.  
If your order is over $50, you will receive a free gift from me--Glimmer Paper if you are local or Linen Thread if you are long distance.  If you place a $50 order on December 11th, you will also get free shipping!

Happy Stamping!
Marsha

Thursday, November 7, 2019

Brightly Gleaming

BRIGHTLY GLEAMING SUITE BUNDLE (EN)

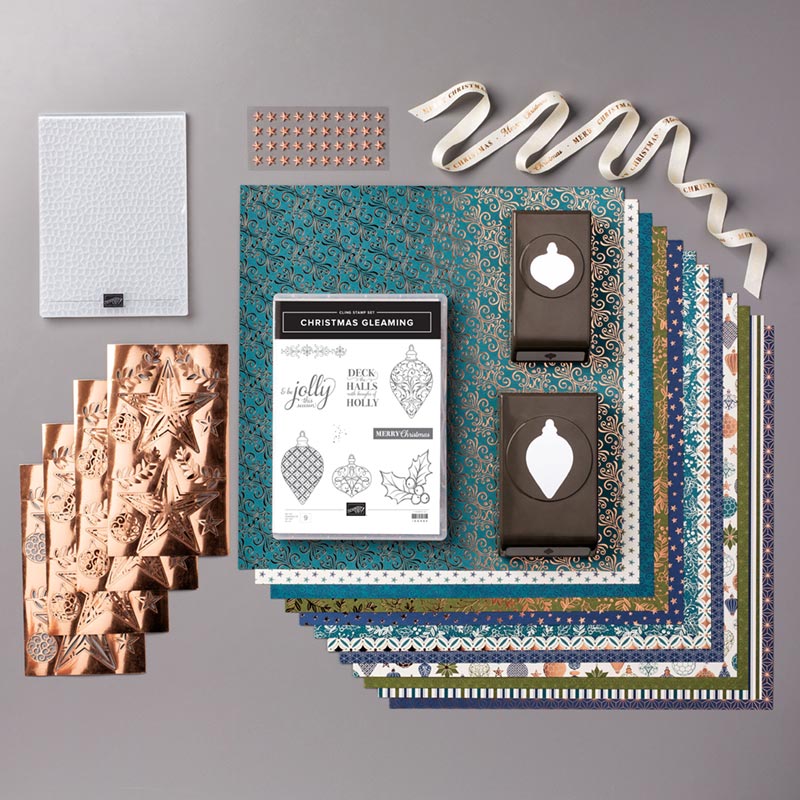
The Brightly Gleaming bundle is a gorgeous suite of products with rich colors of Pretty Peacock, Mossy Meadow, Very Vanilla, and shiny copper.  The best part about it for me is that it comes with punches instead of dies.  I love punches!  These are a few projects I made with this bundle.  I cased them all from either the catalog or other talented stampers, credit given under the watermark.


This is a fairly quick card with the gorgeous foil accented paper doing most of the work.  The ornament is first punched out from Copper foil, then embossed with the Tufted folder.  The greeting comes from the Host set--Greatest Part of Christmas.  I love this set and have used it on so many projects. The set is only $13, but you need to host a party or place a $150 order to be eligible to order it.  It has great greetings for the inside of cards as well!


This card was cased from page 62 of the holiday catalog.  I used Golden Glitz Delicata ink for the holly images.  I stamped the ornament in Night of Navy ink and colored it with Shaded Spruce Stampin' blends, both the light and dark color.  The twine came from a past Paper Pumpkin kit.

This card has a similar feel to the previous card with glitter enamel dots, a bow, and a colored ornament.  I used the Real Red Blends combo, along with a little bit of Dark Cherry Cobbler along the edges.  The bow is tied from Linen thread.  I colored the top of the ornament with Gold Wink of Stella, which is retired now, but you could use the Delicata ink and a blender pen as well.

This card was also cased from the catalog, although I modified it since I didn't have the Stitched Star dies.  I just glued the star from the Brightly Gleaming Foil Elements to a vanilla piece of cardstock, then cut it out.  I embossed the holly image with copper embossing powder on both Old Olive cardstock Very Vanilla cardstock.  I cut out the vanilla berries and clued them on top of the Old Olive piece.


Last but not least, some pretty tags.  The one on the left was cased from Kitchen Table Stamper.  I should have masked the "&" sign, but I didn't think of it until later.  The tag on the left was inspired by one of the cards on p. 30 of the Holiday catalog.  I just took an element of the card and turned it into a tag.

This is a gorgeous suite of products; you really can't go wrong in whatever way you combine them together.  Grab your suite today and have fun creating!

Please use the following hostess code for online orders in  November: BRQ6CA4N.  If your order is over $50, you will receive a free spool of $7 ribbon (your choice of style).

Happy Stamping!

Marsha

Wednesday, October 2, 2019

Christmas Cardinal


The first suite that caught my eye in the Holiday catalog was the Toile Tidings Suite.  What a beautiful selection of products in classic Christmas colors.  I thought of a dear friend who loves cardinals at Christmas and knew I had to own the set just to make a card for her! LOL!  I have always loved toile patterns, so the designer paper was also a must.  Two of the two cards I made were cased directly from the catalog.  This first one is from the cover.  The only change I made was the greeting. 


For the cardinal, I stamped in Memento Black ink and used Real Red blends to color.  The leaves are in Garden Green.  This second card can be found on page 6.


These next two cards were also cased, but I don't know who to give credit to.  I saw them at Michelle Suit's house where she had received them in a card swap.  I love the simplicity and elegance of the first card that mostly features the DSP (designer paper).  The greeting is from the new host set: Greatest Part of Christmas.  This card also has the new Toile Tidings Glitter Dots.


The last card has a lovely monochromatic them with just Very Vanilla and Real Red.  I stamped the bird in Real Red ink, but used Soft Suede on the feet.  After stamping, I colored over parts of the face with a Black Stampin' Blend.  I used Daffodil Delight blends on the beak.  I traced over some of the lines that were red with a black marker.

Thanks for stopping by.  The host code for October is EGAV4KYP.  If you place an order of $50 or more, you will get a package of Jingle Bells for free.  If your order is over $150, do not use the hostess code as you will be the recipient of the hostess rewards.  I will send you the Jingle Bells as well!

Happy Stamping!

Marsha 


Sunday, September 8, 2019

Fall Shadow Box


Fall is my favorite season, so I was especially excited to create this Fall art sampler for my most recent shadow box class. As usual, I scoured Pinterest for ideas and combined multiple elements from things I saw there to make my own special project.

Products
Stamps: Gather Together, Colorful Seasons, Painted Harvest, Lovely as a Tree (retired)

Ink: Crushed Curry, Old Olive, Cajun Craze, Early Espresso

Markers: Early Espresso and Cherry Cobbler on the trees (stamped the leaf part in Crushed Curry ink pad, then colored directly on the rubber stamp with red and brown markers before stamping.  After stamping, I used a sponge dauber in Old Olive ink to fill in the grass)


Paper: Very Vanilla, Cajun Craze, Crumb Cake, Old Olive, Early Espresso, Gold Glimmer Paper, Pumpkin Glimmer Paper (retired), Wood Textures paper (retired)

Other: Gathered Leaves Dies, Seasonal Layers Dies, Leaf Punch, Merry Christmas Dies, Large Letters dies (retired)

September is also back-to-school time here in November.  One of my teacher friends was really hoping I would do a Back-to-School shadow box class. I didn't manage to get the class done, but I did make a sampler for her as a birthday gift. I loved it so much, I made myself one too!  

Sadly, most of these products have retired now, but you can still get the apple! It can be found in the Harvest Hellos stamp set.  Don't forget to get the coordinating punch too!   The colors used were Pacific Point, Daffodil Delight, Real Red, and Granny Apple Green.

Join me for my next Halloween themed shadow box class on September 28th at 2 p.m.  Register on facebook HERE.


Also, be sure to register for the Super Saturday Holiday Extravaganza on October 12th.  

The hostess code for September is CZD322AB.  Please use this when placing an order online.  If your order is over $50, you will receive the new Snowfall Accents Puff Paint for free!

Happy Stamping!

~Marsha