Thursday, January 10, 2019

New Catalogs, New Products!


Although I have a craft room full of stamps, ink, and paper, I still get so excited to browse through the new catalogs!  I attended OnStage in November where I first got to browse through the 2019 Occasions Catalog and 2019 Sale-A-Bration catalog, plus see and try out the new products.  I received some free stamp sets at OnStage, I've placed orders, and I've attended other stamping events which has given me lots of play time with new stuff!  Yippee!

Let's first take a walk through the Occasions Catalog to see some samples of the wonderful new products.  Some of the cards show products from both the Occasions catalog and the Sale-A-Bration catalog which I will shorten to SAB Catalog when I give page numbers.

Turn to pp. 4-7 of the Occasions Catalog to see the gorgeous All My Love Suite.  It's perfect for Valentines Day, Weddings, Thinking of You, and more!  The suite includes the Forever Lovely Bundle, the Meant to Be Bundle, gorgeous paper, and embellishments such as Heart Epoxy Droplets and All My Love ribbon.

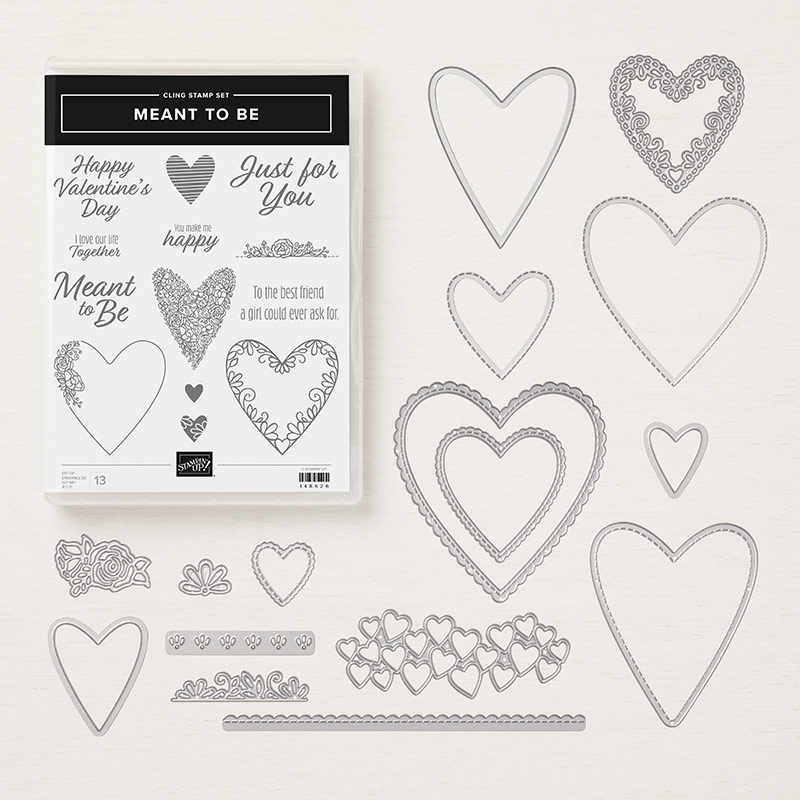
The Meant to Be Bundle was one of the first bundles I ordered.  As soon as it arrived, I had to test out all the die-cuts.  Aren't they wonderful?
Meant To Be Cling Bundle

These are a few cards I've made so far:


These are some photos I took of the display boards at OnStage featuring the Forever Lovely Bundle.

I made the first card below at OnStage and the second card at a class with Janet Wakeland.
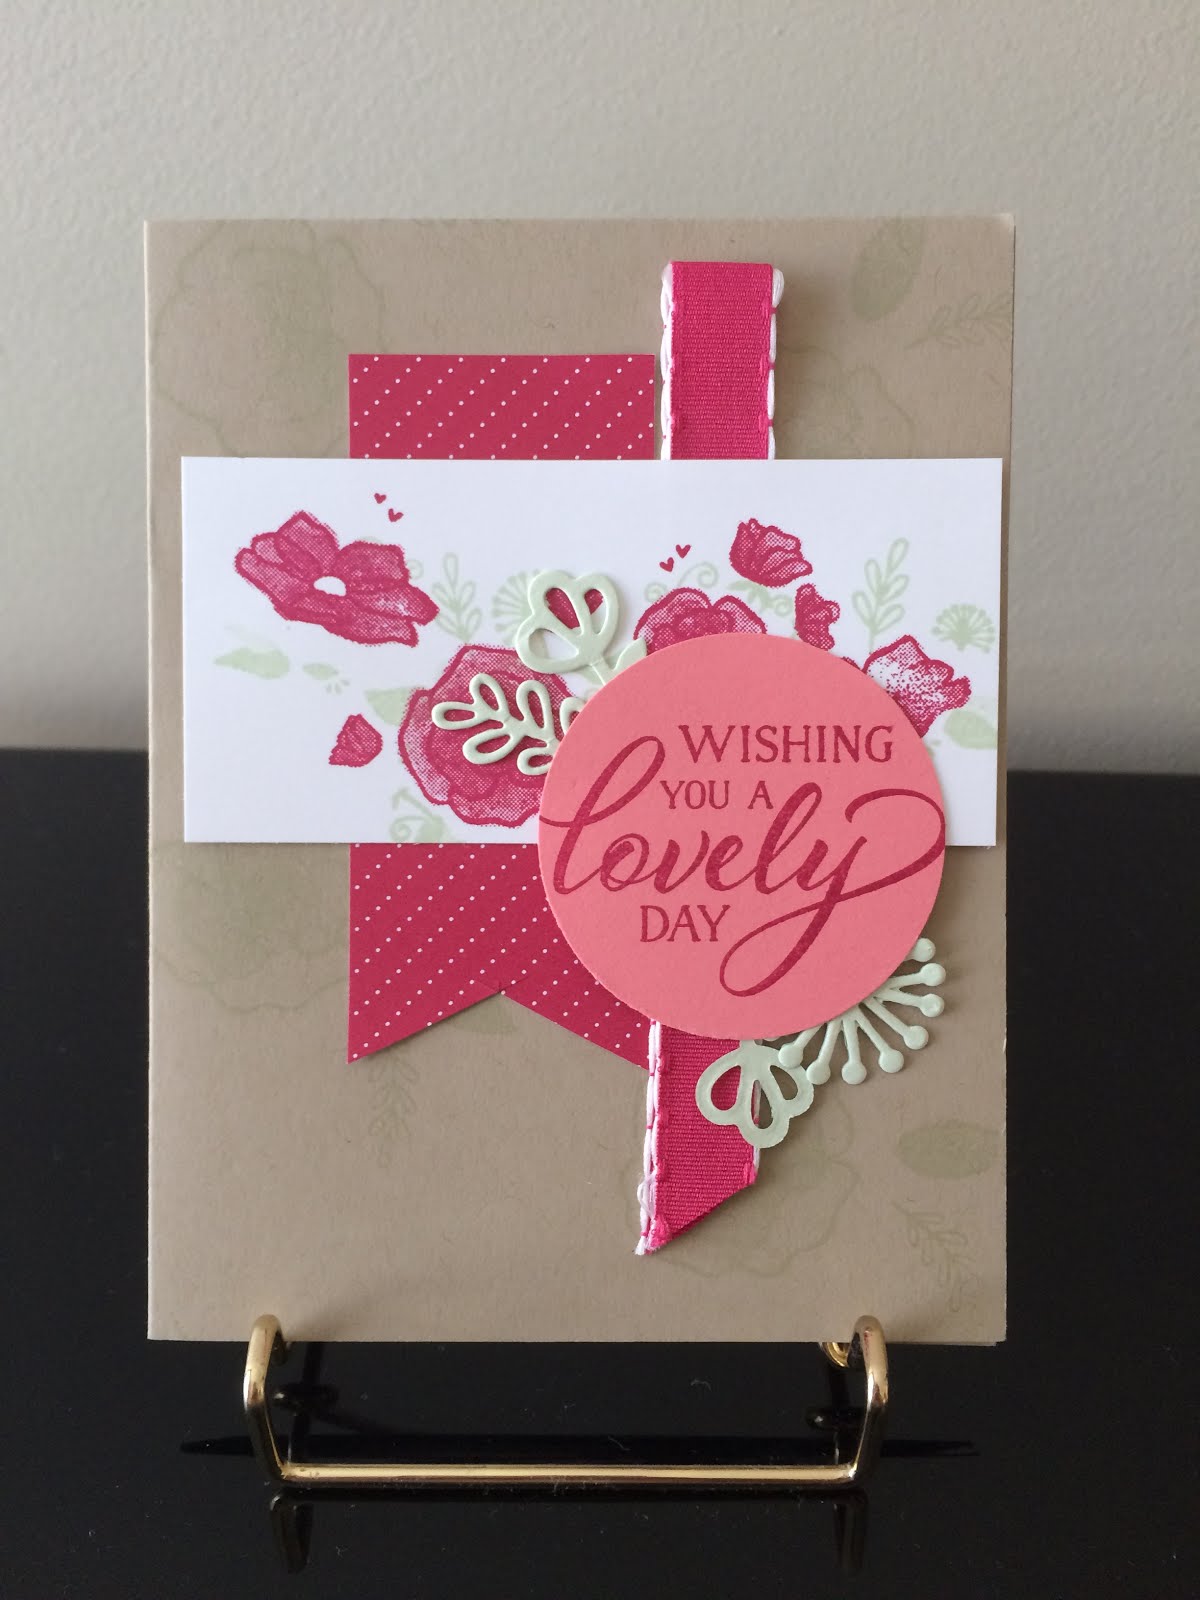
I had the opportunity to go to an event put on by Janet Wakeland where I played with many items from the new catalog.  Most of the following projects were made at her studio or at OnStage.  I made a few on my own with inspiration from Pinterest.

Wonderful Romance (p.11), Well Written Framelits Dies (p. 27), Gingham Gala DSP (p. 35) and the ribbon is a free item in the Sale-A-Bration catalog:

Beauty Abounds Bundle, (p.13)

Sweetest Thing (p. 15)

Incredible Like You (p. 21)

Bloom by Bloom (p. 25)


Amazing Life (p. 28)

Nine Lives (p. 32), this card also shows the Heart Epoxy Droplets colored in with a Stampin' Blend.

Butterfly Bundle (p. 35) and Botanical Butterfly DSP (p. 9 of SAB catalog).

Humming Along (p.36)

Needle & Thread Bundle (p. 39)

Geared up Garage Bundle (p. 43)
Card made at Inkerbelles Team Meeitng with Michelle Suit


Artfully Aware (p.46) and Strong & Beautiful  (p. 48)

Tea Together (p. 49) plus Tea Time Framelits Dies (p. 17 of SAB catalog)

Here are a few more projects made with items from the 2019 Sale-A-Bration Catalog:

Hello Cupcake (p. 6 SAB)
Card design cased from Amy Koenders, inspired by catalog sample


Home to Roost (p. 11 SAB)


Lasting Lily (p. 19 SAB)

Card design cased from Jan Clothier
Card design cased from Mary Fish

Here are a couple of photos from OnStage.  It was such a blast to be with my stamping friends.  Join us at the next one!

My awesome team leader and longtime friend, Michelle Suit.

Members of the Inkerbelles Stamp Team.  Millie made us the awesome scissor headbands!


Thank you for stopping by!

Please use the following host code for online orders during the month of January:  

 K9PMCQT7

If your order is over $50 (before shipping and tax), you will get a free classic ink pad* from me (your choice of color) in addition to your free Sale-A-Bration products!  E-mail me your choice of color after you place your order and I will send it to you at the beginning of February. 

Happy Stamping!

~Marsha~


*If you place your order before my monthly Make & Take class, you can choose to attend my class for free instead of getting the ink pad.  See my calendar HERE.


Tuesday, January 8, 2019

Winter Thank You Cards

Winter is here so snowmen live on!  I wanted to create some thank you cards to send out after Christmas in appreciation for the lovely gifts I received.  I usually like to do some kind of winter theme for Christmas thank you cards, not to mention I was looking for an excuse to use these adorable snowmen one more time!  Most of these products have retired now, but for those of you who have them or want to create something similar, here you go!


Stamps: Spirited Snowman, Petal Palette (Thank You) and Itty Bitty Greetings (Many Thanks)
Paper: Pool Party and Whisper White Cardstock, Christmas Around the World DSP
Tools: 2 1/2" circle punch, Layering Oval framelits dies, Word Window Punch
Ink: Tuxedo Black Memento pad, Stampin' Blends--Smoky Slate, Pool Party, Bermuda Bay, Pumpkin Pie

Thank you for stopping by!

Please use the following host code for online orders during the month of January:  

 K9PMCQT7

If your order is over $50 (before shipping and tax), you will get a free classic ink pad (your choice of color).  E-mail me after you place your order and I will send it to you at the beginning of February. 

Happy Stamping!

~Marsha~

Tuesday, December 11, 2018

Ghirardelli Peppermint Bark Snowman


I love peppermint bark, and what better way to give it than packaged up like a snowman?!  I wish I knew who I saw this idea from first.  I found the idea a couple of years ago.  It's a perfect party favor or small gift.  I made a bunch to give to my seminary students. 


My lighting is not fabulous in these photos, but you can still get the idea.  These are the supplies I used to make my snowman:


First, I bought a large bag of peppermint bark from B.J's.  You can make 13 snowmen out of one bag. I was lucky enough to find it on sale for $7.50, but it usually runs around $10 or $11.


Because I was mass-producing, I punched all of my circles first using the 1 3/4" punch.  I free-hand cut a bunch of little carrot noses out of Pumpkin Pie card stock.  Then I used a black Sharpie marker to add the eyes and mouth.


The Take Your Pick tool was super handy for appling the carrot noses as well as for picking up the tiny hearts I added to the snowman body.


I used a variety of things for the buttons: Rhinestone Basic Jewels, Silver Metallic Pearls, and Black rhinestones (retired now).  I think the black were my favorite, but I only had a few left.  The tiny heart is from the Cookie Cutter Builder Punch.  I put a little strip of red glimmer paper in the punch to cut out a bunch of hearts.  


I used Fast Fuse to attach the white circles to the chocolates; glue dots also work.  As you can see, I worked on mass producing one "body part" at a time:


After I had all the body parts together, I put the pieces inside pretzel bags (bought at Michaels) while I snuggled by my hubby and watched Netflix.  You need to tuck the side flaps of the chocolates around back to fit them in.  This part is a little tedious because the chocolates are a tight fit and sometimes they go in the bag easier than other times.  The Stampin' Up cello bags are sturdier and easier to fill, but I needed the bags right away and couldn't wait for them to ship to me.


I tied up the top with the 1/8" Real Red ribbon from the Holiday catalog (sold out now).  I cut off some of the excess plastic bag.

There you have it, a pile of yummy snowmen to brighten someone's day!


Thanks for stopping by.  Let me know if you give these a try!  

Please use the following host code for online orders during the month of December:  

4WK2ZHYF

I will send you a free classic ink pad (your choice of color) if your order is over $50 (before shipping and tax).  Happy Holidays and happy stamping!

~Marsha~

Sunday, November 18, 2018

Christmas Stamp Camp


Please join me for my Christmas Stamp Camp!  There are three classes to choose from.  Sign up for one, two, or all three!  Food will be served between the first two classes on Saturday to keep you fueled for the day.  These classes are for adults and teens.  No small children, please.

To register for the classes, e-mail me to let me know which classes you want to sign up for; you can then send payment by Paypal, check, or Zelle bank transfer.

Plan to bring scissors, a tape runner, and Tombow glue (if you have it).  If you have Tombow Xtreme adhesive or Fast Fuse, it is recommended for the 3D projects; but you are welcome to share mine if you don't have it.  I will have regular Tombow adhesive available to purchase for $4.


Specialty Card Class, $10
Thursday, Nov. 29 at 10:30 a.m. OR Saturday, Dec. 1 at 10 a.m.
Register by November 22

Although I often try to choose simple card designs for my classes, I wanted to give you the opportunity to take your time and create something magical with this specialty card class.  Make three unique cards including a peek-a-boo card, a shaker card, and a glistening winter scene.  Each of these cards has a lot of steps, so be prepared to have a little patience.  The end product is worth it!  Let me know if you want the penguin peek-a-boo card or snowman peek-a-boo card when you register.


Small Gift/Party Favor Class, $13 for single set, $20 for a double set
Saturday, Dec. 1 at 1 p.m.
Register by November 22

At this class, you'll create festive packaging for five small gifts/party favors.  Gifts include Bath & Body Hand Sanitizer, Hot Chocolate, Chapstick, Ghiradelli Peppermint Bark made into a snowman, and Hershey Kiss-mas trees.  This class will also include PDFs with measurements and instructions so you can recreate these projects at home.  Let me know when you sign up if you want a single or double set.


Gift Tag Class, $5 for 5 tags
Saturday, Dec. 1 at 3 p.m.
Register by November 22
Make 5 beautiful gift tags with the Sincerely Santa Project Kit.  When I originally offered this class, there was an option to make the entire kit of 30 tags, but the kit has sold out making that option no longer available.

Friday, October 5, 2018

Winter Woods

The Winter Woods Bundle is definitely among my favorites from the Holiday Catalog.  The samples in the catalog were so gorgeous, I knew I HAD to have it!


Of course, I did what I always do when I get a new set.  Visit Pinterest!  I like to make several cards with my new sets right away so I feel like I get my money's worth.  I was also looking for the perfect designs for my upcoming stamp classes.  These are the cards I have made so far....thanks to the wonderful designs I found on Pinterest.

Card 1--I can't find the name of the original creator!
Card 1 is my absolute favorite!  I saw it on the Demonstrator Planning Page on Facebook on September 21, and for the life of me, I CAN'T find it now to give credit to the original designer!  I stamped the trees with Shaded Spruce ink on the white card base.  Then I used the Softly Falling Embossing folder to emboss a layer of vellum cardstock to put over the top.  The whispy tree branches were die cut from Dazzling Diamonds glimmer paper.  The "Merry" was die-cut from Gold Foil sheets using the new Merry Christmas thinlits.  The word "Christmas" also came from the matching Merry Christmas to All stamp set.  The big fluffy tree was stamped twice and cut with the two different tree dies that come in the bundle.  To make the snow, I used white liquid applique (not from SU), sprinkled it with Dazzling Diamond Glitter, and heated it until it puffed up a bit.  This card is such a beauty!  Thank you to the original creator, I wish I could find your name to give you credit!

Card 2, found design on Amy Koender's website

Card 3 Front, found design on Amy Koender's website

Card 3 Inside
Cards 2 and 3 combine the Winter Woods bundle with Under the Mistletoe DSP.  The green on both trees is Old Olive.

Card 4, found design on Heartsdelightcards.com
Card 4 is more simple with Navy Blue and White.  The greeting is from a past Paper Pumpkin Kit.  I added a little Dazzling Diamonds glitter and pearls for shimmer.

Card 5, it was on Pinterest with no name credit or blog/website connected
Card 5 makes me feel like I'm really out in the woods!  I stamped the background trees over and over in Soft Suede ink.  The green is Garden Green.  I added a little Dazzling Diamonds glitter to the tree and top of the snow line for sparkle.  I've found the glitter sticks best if you tear your paper for the snow line rather than cut it with the die-cut (as shown in the Navy Blue and White card).

Card 6, another winner from Amy Koenders
I love the rustic, manly look of Card 6.  The plaid paper is also from "Under the Mistletoe" DSP pack.  The colors are Old Olive, Night of Navy, and Crumb Cake.  This ribbon is the new Braided Linen Trim.  I love that stuff!

This set is really a winner!  I have so many other cards pinned that I still want to make.  So much to stamp, so little time!


Tuesday, September 25, 2018

Home for the Holidays Retreat

I just returned from a wonderful "Home for the Holidays" stamping retreat put on by Michelle Suit at the Wyndham Garden Hotel in Manassas.  Michelle had her entire collection of stamps, punches, dies, ink pads, etc. in the room that we were free to use for the two and a half days we were there.  

Of course, I brought plenty of my own stuff too!  We each had our own 8-foot table to work at.  It was so wonderful to have some uninterrupted time to play with my craft collection!

In addition to having time to work on our own projects, Michelle also had some fun make & takes for us to do.  
Treat Pouch made with Santa's Workshop suite.

Made with "Making Christmas Bright" stamp set and "Christmas Bulb Builder Punch"

Origami gift card holder made with "Celebrate the Season" stamp set
Adorable card made with "Signs of Santa" Bundle
Inside of card above
Made with "Country Home" stamp set and "Buffalo Check" background stamp; colored in with blends

Michelle had these adorable cookies waiting for us at our table when we arrived.
Michelle is a talented and generous lady.  I highly recommend all of her events!  Find Michelle at SuitablyStamped.