Showing posts with label Party Favor. Show all posts

Wednesday, January 17, 2024

Easy Valentine Lollipop Sleeve

Today on my Facebook Live, I showed how to make this easy sleeve to put on a Valentine lollipop.  The heart punch is retired, but you could easily use a different punch, a die, or skip making the window and just decorate the front however you like.  This treat uses very little materials and doesn't take long to put together.  It's a perfect inexpensive favor for mass production!  

Here is the video:


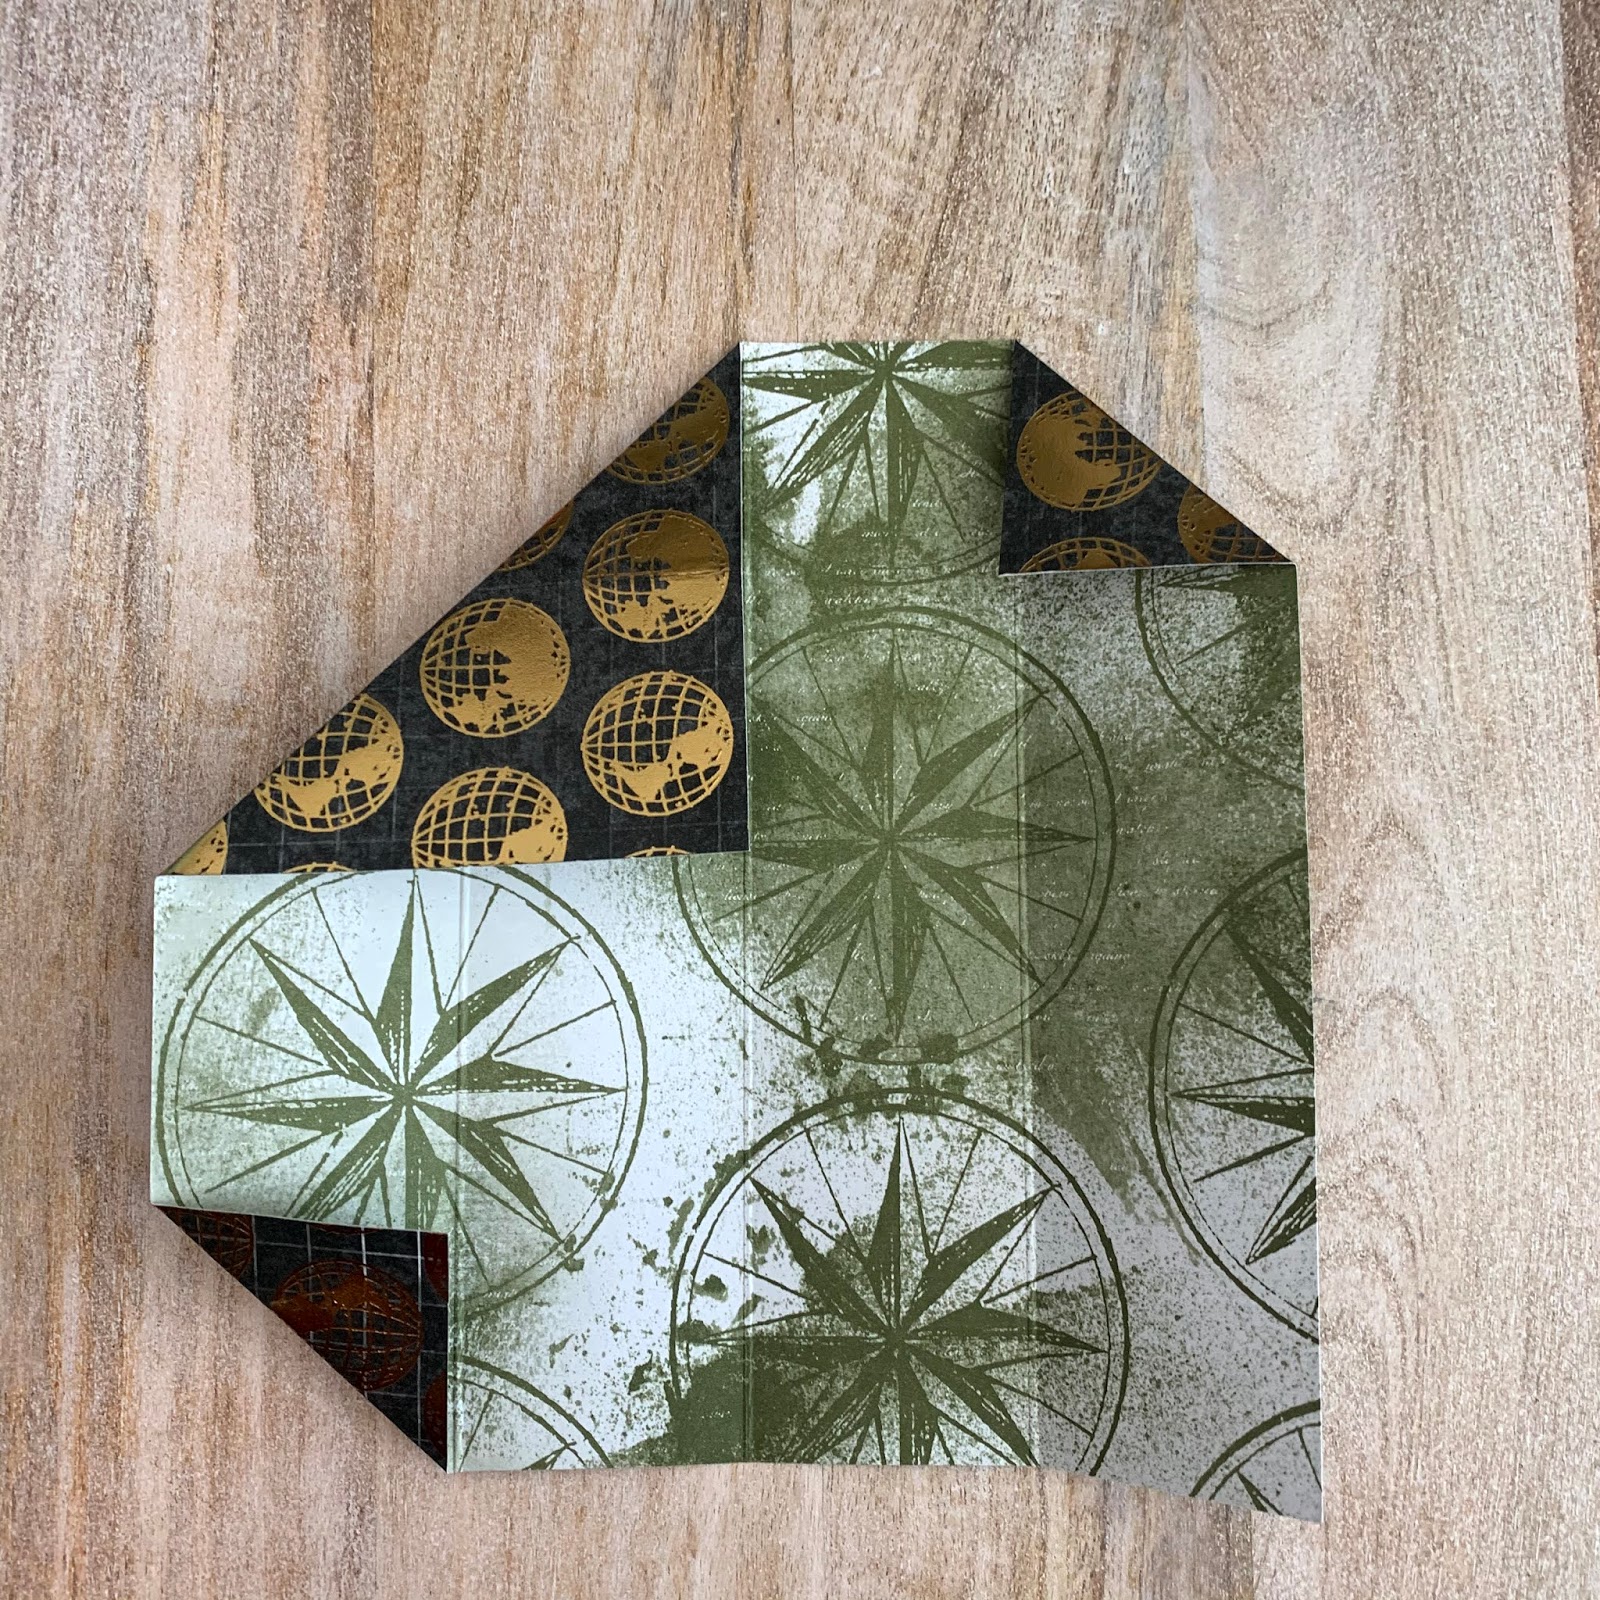
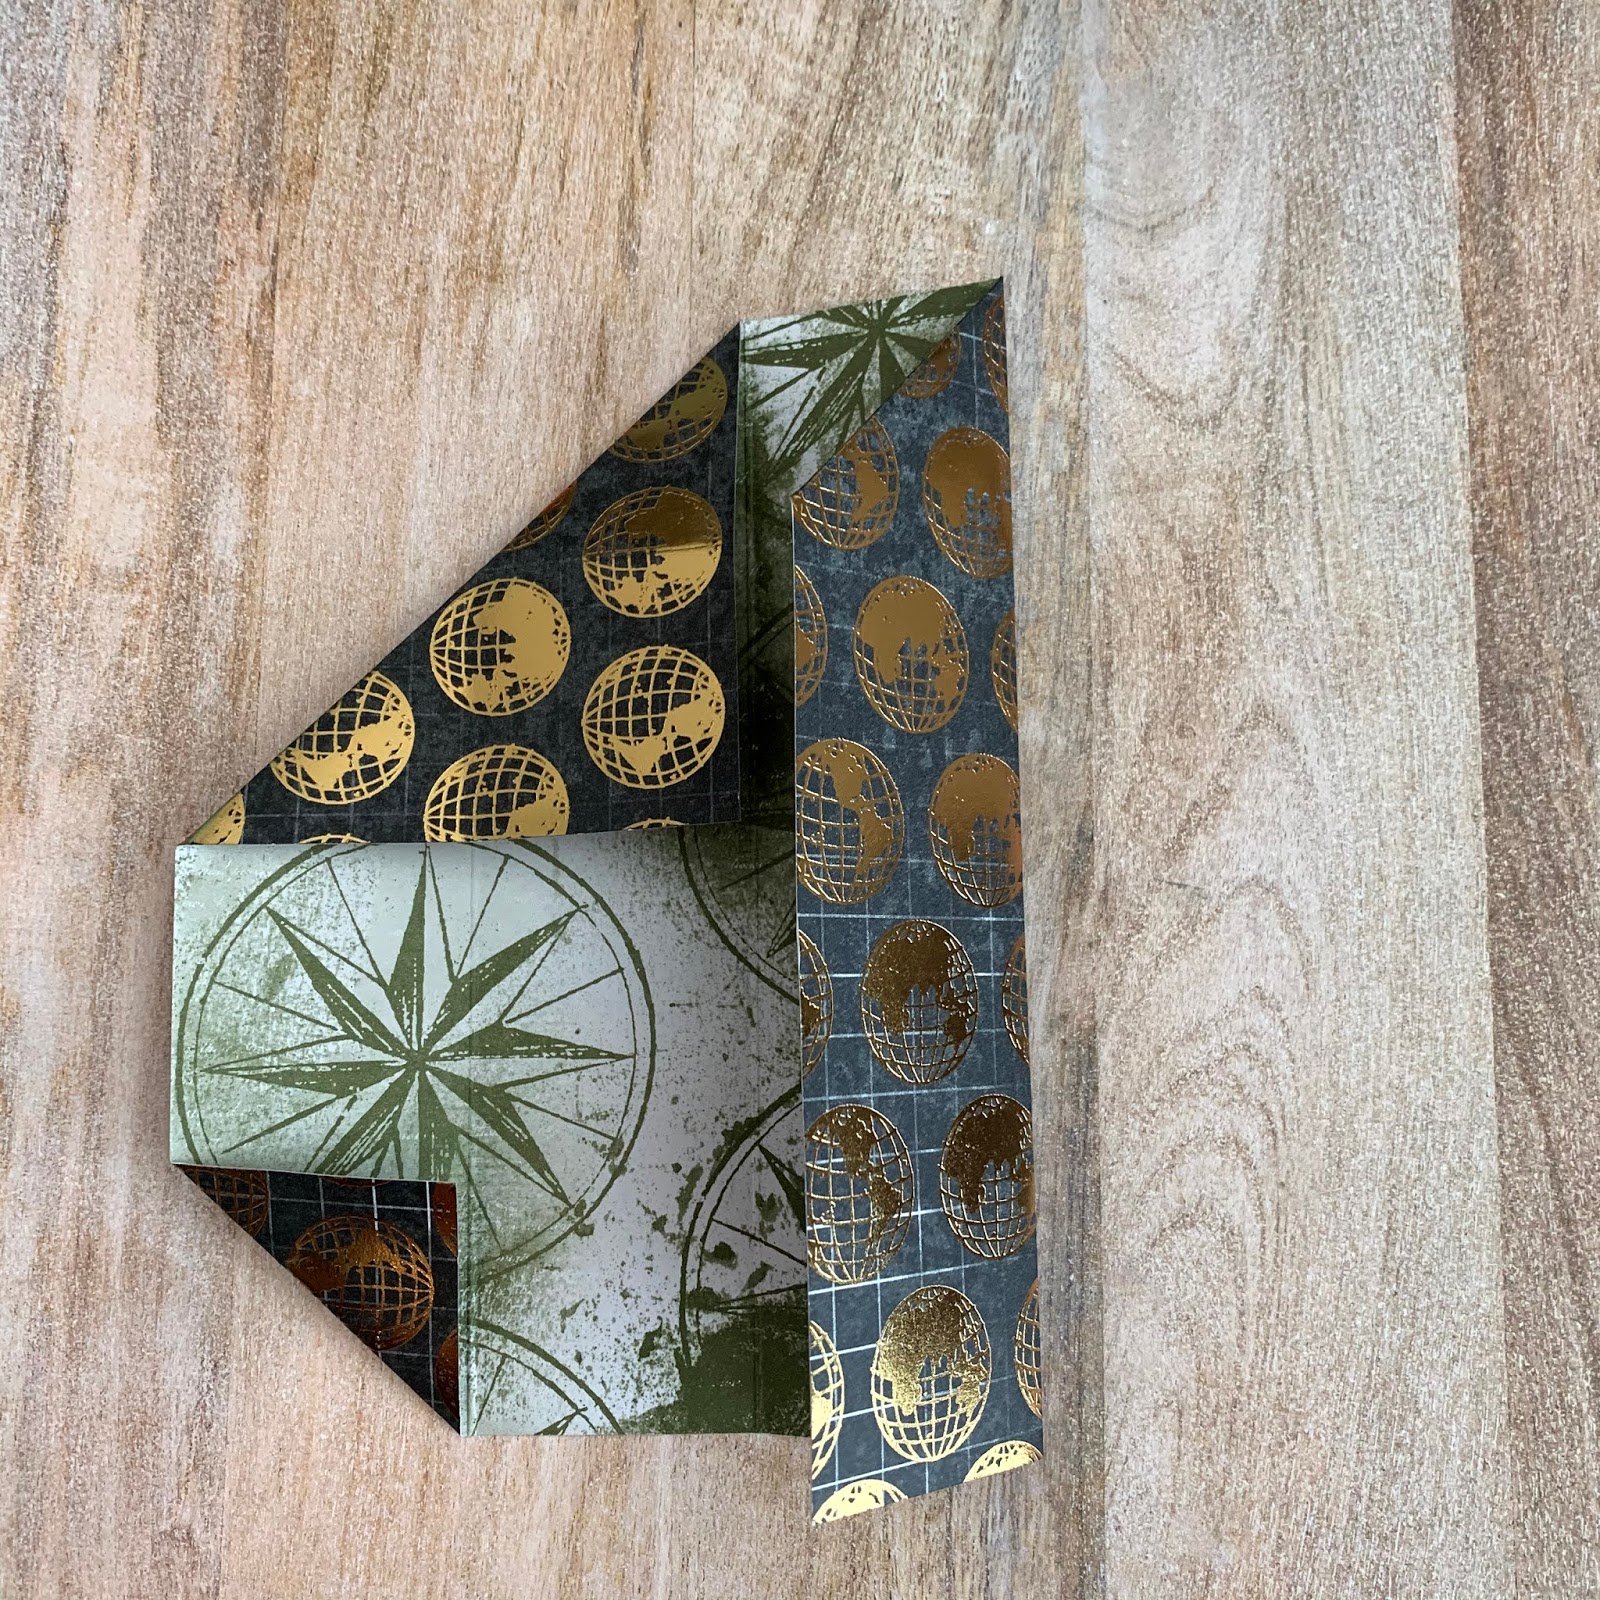
These are the measurements in inches:

  • Real Red cardstock: 2 x 5-1/8
  • With 5-1/8 side at the top, score at 3/8, 2-3/8, 2-3/4, and 4-3/4
  • Most Adored Specialty DSP: 1-3/4 plus a 16th square
In the video, I show you how you can score and cut 4 at once if you want to make multiples.  You can keep it super simple with no greeting.

Or add a greeting.  This greeting came from Country Bouquet.  I embossed it with white embossing powder on black cardstock.

Today I also shared two new kits from Stampin' Up's Kit Collection.  The greetings and images are pre-printed and die-cut, so the cards come together super quickly.  It's a great project to do with children or new crafting friends.  Each kit is only $14 and comes with supplies to make 8 cards, 4 each of 2 designs.  Aren't the pandas so cute?

Panda Friends Kit:


Rock Legend Kit:

Thank you for stopping by today!  Don't forget to take advantage of the Sale-a-bration promotion running now until the end of February.  You can get the paper I used on the lollipops--Mostly Adored Specialty Designer Series paper--free with a $50 order.  Please use the January host code (VS6T4GCW) on orders under $150 to receive an additional free gift from me!

Come cruise with me!

Product List
Sweetheart Punch
Sweetheart Punch
[133786]
$16.00

Wednesday, June 16, 2021

Glue Holder Gift


Like many demonstrators, I'm always on the look out for small gifts I can give customers and team members.  Glue makes a good gift for crafters, so I made a bunch of these last January to give as table gifts at my craft retreat.  Recently, one of my guests asked me how to make them, so I decided to make a video in my Facebook Live today.  They are super easy!  I saw the idea for this on Pinterest, but all the blogs/videos I visited were either in a foreign language, or the creator used a punch board to make them.  I tweaked the punch board version to make easy straight lines so the only thing you need is a paper trimmer and circle punch (or circle dies).  I would share the link for the punch board version, but I can't find it anymore!

You can see the VIDEO of me making the glue holders HERE.

Here are the measurements in inches:
  • Carstock color of your choice: 5-1/4 x 7-1/2
  • With the 7-1/2" side at the top, score at 1-3/4, 3-1/2, 5-1/4, and 7
  • Turn the cardstock so the 5-1/4 side is at the top, then score at 1-3/4 and 3-1/2
  • Designer Series Paper (I used Sweet Symmetry): 1-5/8 squares (cut 4)
After you get your basic rectangle shape, cut along the score lines and punch or die-cut a circle as shown below.  Then add your DSP (designer paper).  In the video, I show how to cut two at once out of one sheet of cardstock.


You can add a sentiment, or just let the DSP shine.  For one of my boxes, I used the new Encircled in Friendship Bundle for both the sentiment and the die-cut label piece.  The cardstock is Just Jade.


On the next box, I used a retired set--Crafting Forever.  The dies are also retired--Little Treat Box dies.  The cardstock is Night of Navy.


My friend and I made over 25 of these boxes for gifts at my retreat, so they aren't the worst thing to mass produce! LOL!  I gave a glue eraser along with them.


Thanks for stopping by today!  I hope you will enjoy making these glue holders.  You can see the supply list below.  Please use the following host code for online orders in June: V6KDKJAA.  If your order is over $50, you will get a free roll of Flirty Flamingo Metallic Ribbon as a thank you!

Happy Stamping,
Marsha

Product List
1-1/4" (3.2 Cm) Circle Punch
[119861]
$16.00

Thursday, April 15, 2021

Post-it Books

I'm excited to share this fun project with you today.  You can take some ordinary post-it notes and turn them into a beautiful gift!  I have shared a different pattern for making post-it note pouches in the past.  Check it out HERE if you would like to see both styles.

I found the instructions for this post-it note holder on the Song of My Heart stampers blog.  I found my pens in the Easter section at Michaels.  I think next time I might try using mini-mechanical pencils like the ones found HERE.  

You can see me make these post-it books on THIS VIDEO.

I always use the Highland brand of sticky notes.  You can get a great price on Amazon.

This is the front of the books:


And this is the inside: 
I thought the sentiments from the Waterfront stamp set were so perfect.  My stamping friends always make the good times better and have especially made the hard times easier this past year!

Measurements:
  • Cut Melon Mambo or Highland Heather cardstock at 3-1/4" x 10-1/2".  With 10-1/2" side at the top, score at 3-1/4, 3-5/8, 4, and 7-1/2.
  • Watch the video to see how to put the book together.
  • Black layer: 3 x 3 (cut two)
  • White layer: 2-3/4 x 2-3/4 (cut two)
  • DSP layer on the inside: 2-1/2 x 2-1/2
  • Use the Double Oval Punch for the inside greeting.
  • The tulips were stamped in Melon Mambo and Gorgeous Grape.
  •   Immediately after stamping, I ran over the images with a water painter to soften the lines (it also lightened the color). The leaves and stems were stamped in Granny Apple Green.    
I gave these post-it books to my team members who attended On Tour with me.  I put them in a goody bag with a few other things.

I hope you'll give these post-it books a try!  If you make them before 4/20/21, go post a picture on my Happy Stampers with Marsha Facebook group to get entered to win a $5 coupon toward one of my classes.  I'll post the winner on 4/21/21. Be sure to use the hashtag: #postit to get entered.

If you would like to order this month, please use the following host code: GKRWNCXV.  You will get a free pack of Rhinestone basic jewels from me on orders of $50 or more.

Happy Stamping!
Marsha


Product List

Wednesday, July 22, 2020

World of Good Pen Holder


These pen/pencil pouches make a nice gift for both men and women!  They are really easy to make and only require a 6" x 6" piece of DSP.  You can see a video of me making these pouches HERE.  I put pens in my pouch, but I saw a very cute version of these pouches done with pencils by SallyStampers.  I think a holiday version would be so adorable!

Start with a 6" x 6" piece of DSP.  When you go to score it, make sure it is in the your trimmer right side up if your paper is directional.  Score at 1-1/2", 3", and 4-1/2".  Fold along your score lines and fold in the corners as shown below (or watch the video for easier  understanding).


This is the back side.
Put your pen or pencils inside and tie with a ribbon.  You don't seal the bottom.  If you use pencils, they peak out the bottom.

Thank you for stopping by!  Please use the following host code on online orders this month: Y6DZBVGA.  If your order is over $50, you will get a free acrylic block from me, your choice of C, D, or H.  If your order is over $150, do not use the code as you will get your own host rewards, plus the free block.  Email your choice to me after you place your order.

Happy Stamping!

Product List
1" (2.5 Cm) Circle Punch
[119868]
$13.00