Showing posts with label Christmas. Show all posts

Friday, December 6, 2024

Gift Box for Foaming Hand Soap

Today I want to share with you a cute packaging idea for gifting Bath & Body Foaming Hand Soap.  This is one of my favorite gifts to receive because a) I love the scents, b) it's practical and useful, and c) it won't take up room in my house because I will use it up and throw it away!  Ha, ha, ha!  I saw the idea and measurements for this box from Jessica Lewis at Scrap Sprinkle Crop.

I showed how to make this project on Facebook Live this week.  You can see the replay on Facebook HERE (no ads), or click on the link below to watch it on YouTube:


In the summer, I made a lemon version to give to my retreat attendees with some lemon scented soap inside.


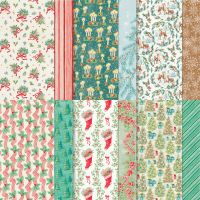
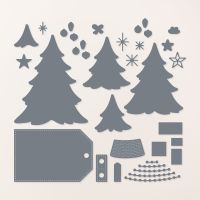
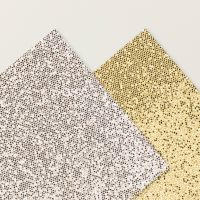
Now it's the time of year to make Christmas versions!  I used Shaded Spruce and Cherry Cobbler cardstock to match the soap I had on hand (the soap was probably bought last season).  I chose Sentimental Wishes Designer Series Paper to wrap around the box.  The little stars were die-cut with the Merriest Tree Dies out of More Dazzle Specialty Paper which is retired, but they would also look great cut out of Gold Foil paper.


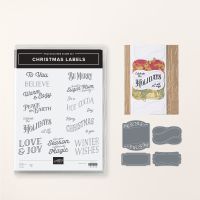
For the Shaded Spruce version above, I used Christmas Labels bundle for the sentiment and label piece.  For the Cherry Cobbler version below, I used Greetings of the Season bundle for the sentiment and tag.


Measurements in inches:
  • Cardstock box (Shaded Spruce or Cherry Cobbler): 7-1/4 x 10; with 10" side at the top, score at 2-5/8, 4-3/4, 7-3/8, and 9-1/2
  • TURN and score at 6"
  • Sentimental Wishes DSP: 3 x 10; score at the same marks shown above
  • Cut as shown in the picture below


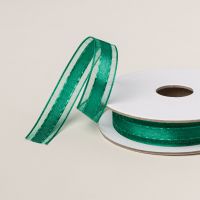
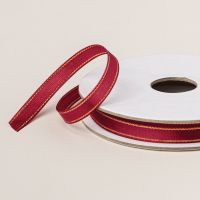
I used Shaded Spruce 1/2" Satin & Sheer ribbon for the handles.  I attached them with tear tape.  You can see how I did this and how I assembled the box in the video linked above.

Thank you for stopping by!  I hope you give this a try.  You can find a list of supplies at the end of this post.

My host code for December is HGTHNHA2.  Use this on your orders in December to get a free gift from me!

Have you ever wanted to try a crafting cruise?  Come join our next Sail Away Stampers Cruise in September of 2025 traveling to Canada and New England.  Read all about it HERE.

Happy Stamping,

Marsha

Product List

Wednesday, August 7, 2024

Santa & Snowman Boxes


Today I want to share how to make these adorable Santa and Snowman boxes.  I got the recipe for these boxes from Tami White, but she used the Tricks & Treats Dies for the box, which are now retired, so I changed the recipe.  You only need your paper trimmer for the basic structure, plus you can get two out of one sheet of cardstock.  Bonus!  Do check out her post though (linked with her name), because she has a super cute elf version as well!  I changed the box sizes so they are slightly different from each other, but you could definitely make them the same size.

You can see the Facebook Live video of me making these boxes HERE.  The measurements are written below.


Santa Box measurements in inches:
  • Real Red: 5-1/2 x 8-1/4
  • With 8-1/4 side at the top, score at 3-1/2 and 4-3/4; turn so 5-1/2 side is at the top and score at 1-1/4 and 4-1/4 
  • Cut on the score lines as shown in the photo below.
  • Basic Black (belt): 1/2 x 9
  • Basic Black (suspenders): 1/2 x 5 (cut 2)
  • Basic White (front piece): 1-1/2 x 3-1/2
  • Silver Glitter Paper: 1" square, plus extra to punch 1/2" circles
  • Basic Black (piece inside the buckle): 1/2" square
  • Red & White scraps to die-cut the Santa hat

I did use some retired dies to complete the box--Scalloped Contours Dies to get the scallop edge on the white front trim and Sending Cheer Dies for the hat.  If you don't have those, you could skip the hat and leave the white edges straight (or use scallop scissors).  I made these boxes for the guests at my recent Christmas in July craft retreat.  I put a wooden stamp inside along with some candy.


I ordered the "Handmade with love this Christmas" stamps HERE. I decided to use mini brads to attach my handles so they could move aside to put stuff in and take it out.  It would be much easier just to staple or tape them if you don't need them to move.

Now on to the Snowman box.  I filled it with Hot Cocoa, marshmallows, and a candy cane to make "Snowman Soup." You can find various poems on the internet for that.


Snowman Box measurements in inches:
  • Thick Basic White: 5 x 8-1/2
  • With 8-1/2" side at the top, score at 1/2, 3-1/2, 4-1/2, and 7-1/2
  • Turn so the 5" side is at the top and score at 4"
  • Cut on the score lines as shown in the photo below.
  • Basic Black (hat top part): 2-3/4 x 1-3/4 (cut 2)
  • Basic Black (hat bottom part): 3-1/2 x 1 (cut 2)
  • Pumpkin Pie: 1/2 x 1-1/2 (trim to nose shape)
  • Basic Black: Scrap to cut buttons
  • Granny Apple & Real Red: Scraps to die-cut holly

For the buttons, I originally cut both the square and circle ones with the Crafting with You Dies, but since I had to cut over 40 boxes for my retreat (200+ round buttons), I opted to buy round buttons from Amazon instead (find them HERE).  Once again, I used the retired Sending Cheer dies to cut the holly on the snowman hat, but I'm sure you can find an alternative!


Let me know if you give these adorable boxes a try.  I'm posting a supply list below, but keep in mind that the Sending Cheer Dies and Scalloped Contour Dies are retired, as well as the Gold & Silver Glimmer Paper.

If you are planning to place an order, please use my August host code on orders under $150: USNXR3BA.  If your order is over $50, you will receive a free gift from me, as well as Frequent Stamper Reward points.  If your order is over $150, you will receive the same plus Stampin' Rewards (free product) from SU.

Happy Stamping!

Marsha

Supply List:

Wednesday, November 1, 2023

Beary Christmas Projects


Happy November Friends!  Even though fall is my favorite season, I want to share some Christmas projects with you today.  I've been wanting to share these projects for a couple of months now, but life has been SO busy!

In September, I hosted a Beary Christmas craft retreat where we made six beary cute projects with the new Beary Cute bundle!

I shared how to make the following fun-fold card and two of the table gifts on a Facebook Live.  You can CLICK HERE to watch the video on how to make this card.  I also show how best to cut the DSP with these images to maximize use for other cards as well. 


Fun Fold Card Measurements (in inches):
  • Night of Navy card base: 5-1/2 x 8-1/2, score at 4-1/4
  • DSP (speckled navy): 4 x 5-1/4
  • Basic White: 5-1/4 x 8; with 8" side at the tope, score at 4" and 6"
  • DSP (balmy blue with stars): 2 x 5-1/4
  • DSP (baby bear): Use Stylish Shapes Dies to die-cut a circle with the baby bear image on it
  • Basic White: Die-cut a circle (I used retired Layering Circle Dies)
  • DSP (sleeping bears): 6" wide.  After di-cutting the baby bear, fussy cut the sleeping bears image along the top, keeping it 6" wide
Be sure to watch the video for tips on how to put this together.

These are some of the other make & takes we made at the retreat:

A simple card where the DSP does most of the work!

This is a pouch to hold a 3 x 3 pack of Highland brand sticky notes.  
I forgot to take a picture of the inside!

This card was a labor of love with all the fussy cutting
and embossing, but I love how it turned out!

I cased the next two cards from Helen Read at All Things Stampy.


Those are the six projects we made.  If you would like the PDF and video tutorials for making all six projects, you can purchase it with the button below for $15.


My guests also received some adorable bear-themed table gifts. I showed how to make the first two gifts in the video linked above. 

First, the classic Hershey Nugget Tray (shown in the video at 
23:38 minute mark):
The greeting on the brown bear version is from a retired set.

The greeting on the back is from Festive & Fun set.

Hershey Nugget Tray Measurements (in inches):
  • Night of Navy (for tray): 2-3/8 x 4-1/4, score at 1/2 and 1-7/8 (or 1/2" in from each side)
  • DSP strips (to go around nuggets): 1 x 3
  • Night of Navy (for topper): 2-1/4 x 4-1/2, score at 2-1/4
  • DSP (on topper): 2 x 2
Next I made little booklet to gift some Extra gum, Polar Ice flavor of course!  You can find me making this in the video at the 34:09 mark.

The greeting on the front is from So Very Merry stamp set.
The greeting on the inside is from Festive & Fun.


Extra Gum Booklet Measurements (in inches):
  • Night of Navy: 3-1/4 x 5-1/2, score at 2-1/2 and 3
  • DSP (front and inside): 2-1/2 x 5
  • Greeting circle was cut with Deckled Circle Dies, inside rectangle was cut with Deckled Rectangle Dies
This final gift was not handmade by me.  I purchased these little snowflake and bear soaps on Etsy.

I hope you found some ideas in this post to inspire your creativity!  Have a Beary Merry Christmas!

Before I go, I must share the news about the Sail-Away Stampers crafting cruise I'm co-hosting with my friend, Cindy Lake.  Click on the image below to read all about it!


Please use the following host code on your November orders: PH9K94F2. When your order is over $50, you will receive a free gift from me!

Happy Stamping!
Marsha

Product List